

Hi Everyone, in the last article we discussed the different VPC terminologies. That may have given you a high-level idea about a VPC in AWS.
In this article, we are going to create a custom VPC with a public and a private subnet. Each subnet will have an EC2 instance. We will also be Creating a peering Connection Between 2 VPCs.
Creating a Custom VPC
- Log into your AWS console and select VPC, Click on Your VPCs in the left sidebar and then click on Create VPC.
- Give a name to your VPC and the IPv4 CIDR block that you would like. You can enforce the tenancy of EC2 instances launched in this VPC. If you select dedicated then all your instances will be launched on dedicated tenancy instances (more cost). If you select the Default option then instances will use the tenancy option selected while launching them.
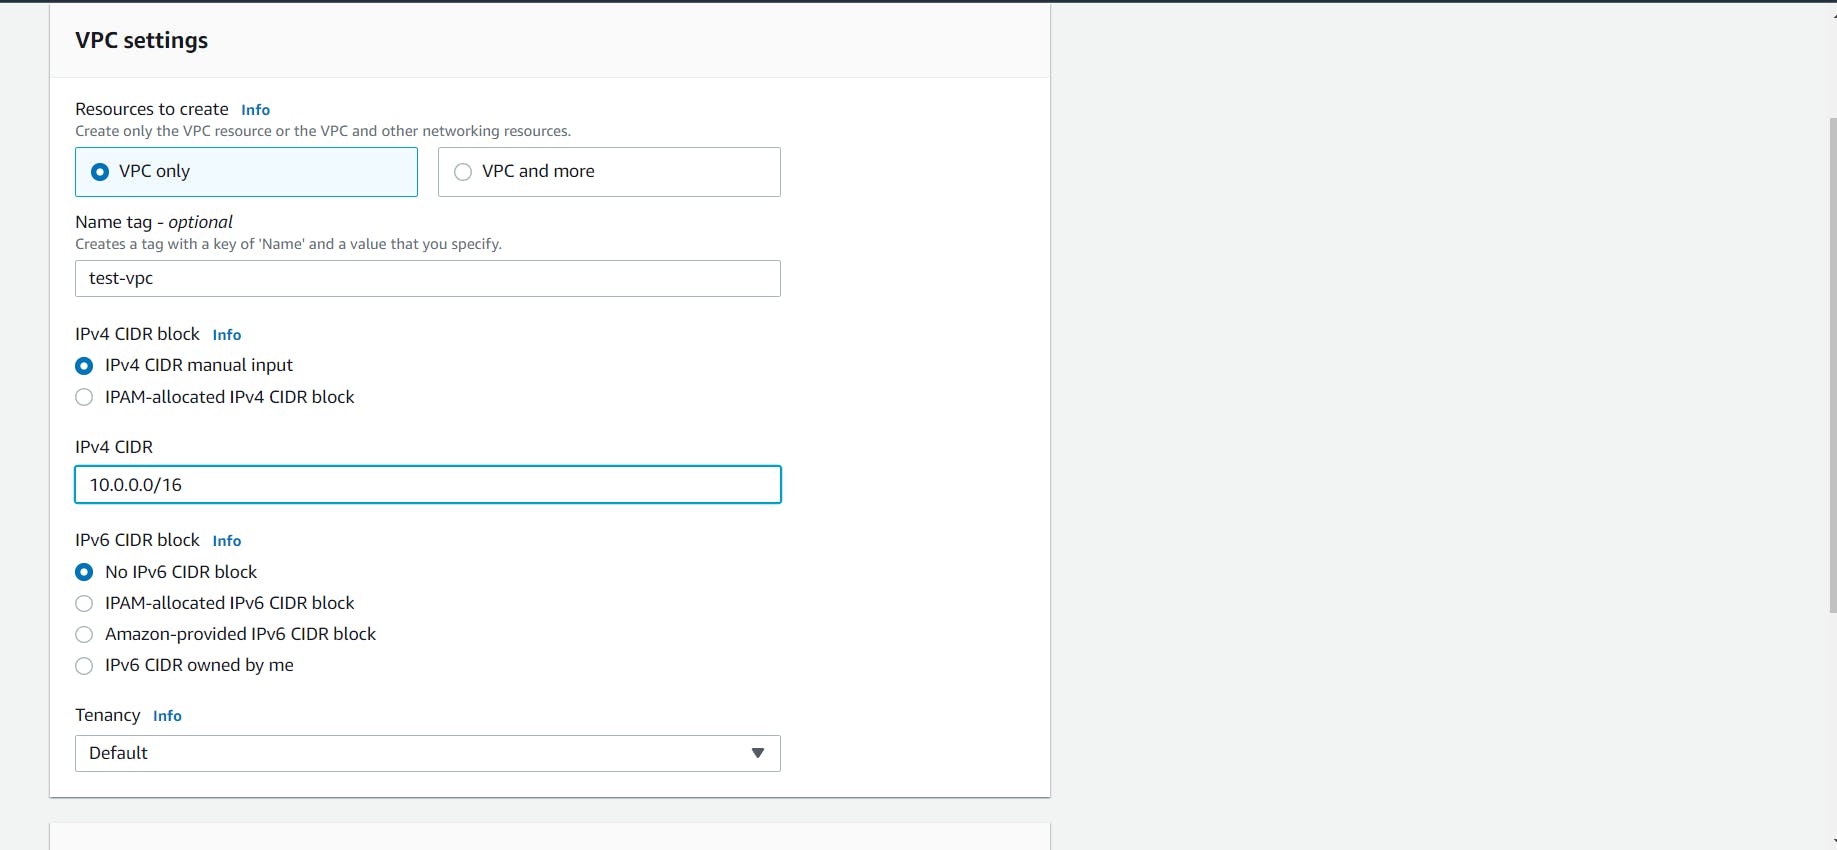 Click on the Create button to create your custom VPC!
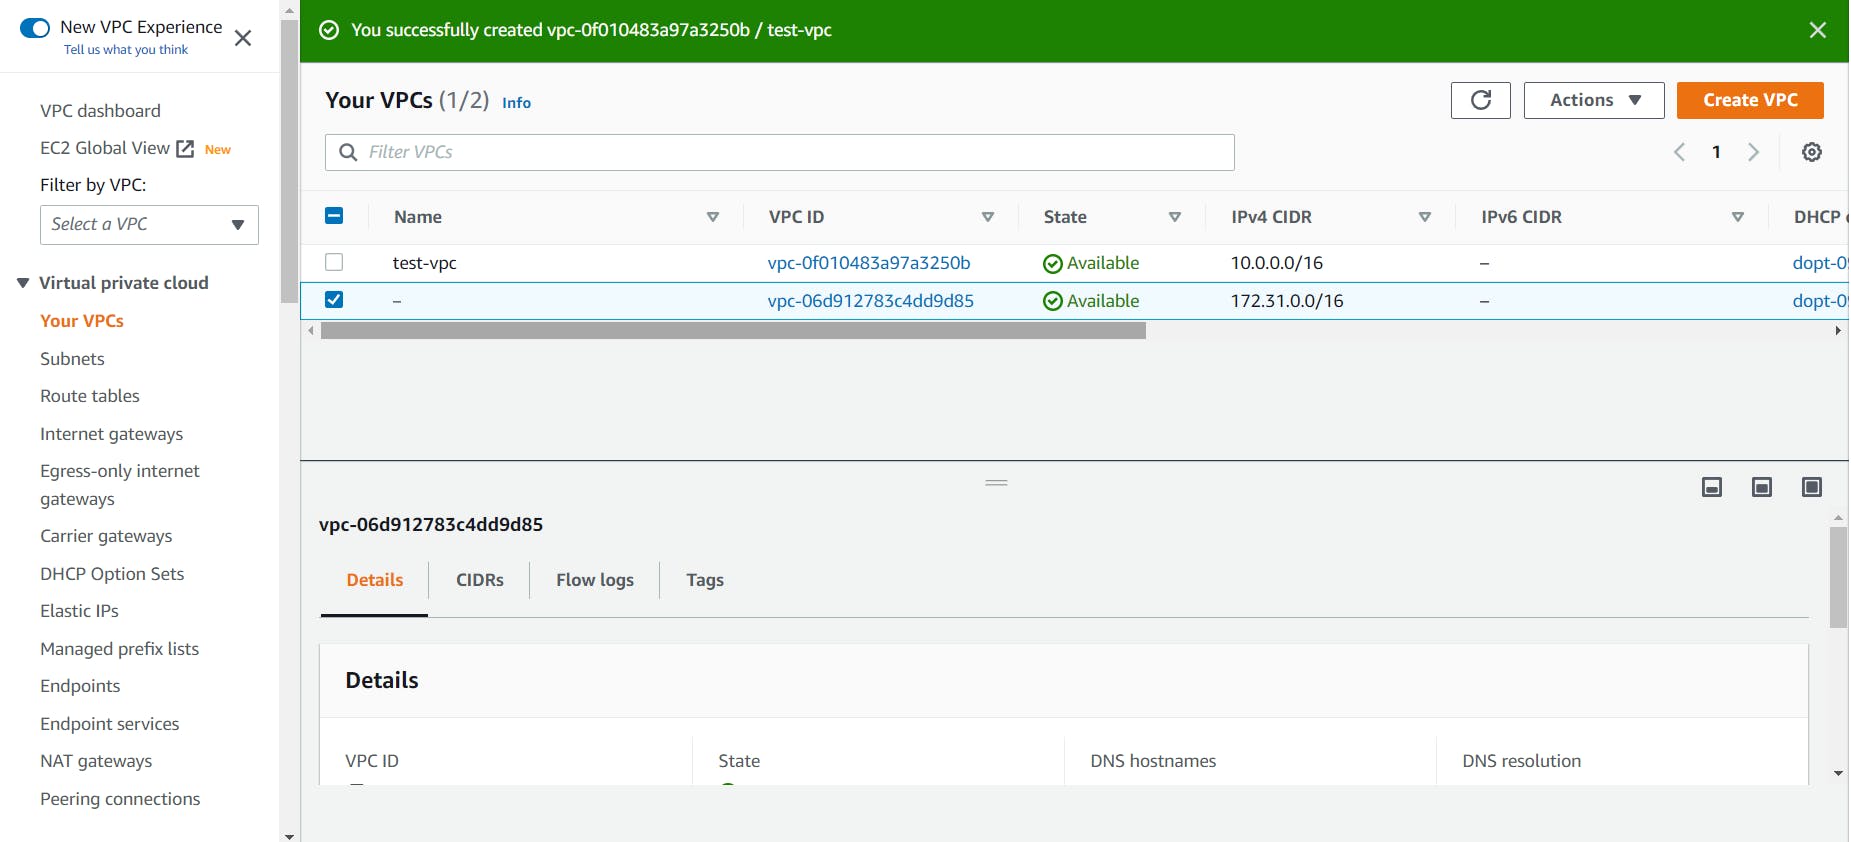
Now, you can see your custom VPC along with the default VPC.
- Now let’s create our public and private subnets by selecting the Subnets tab from the left sidebar and clicking on the Create Subnet button.
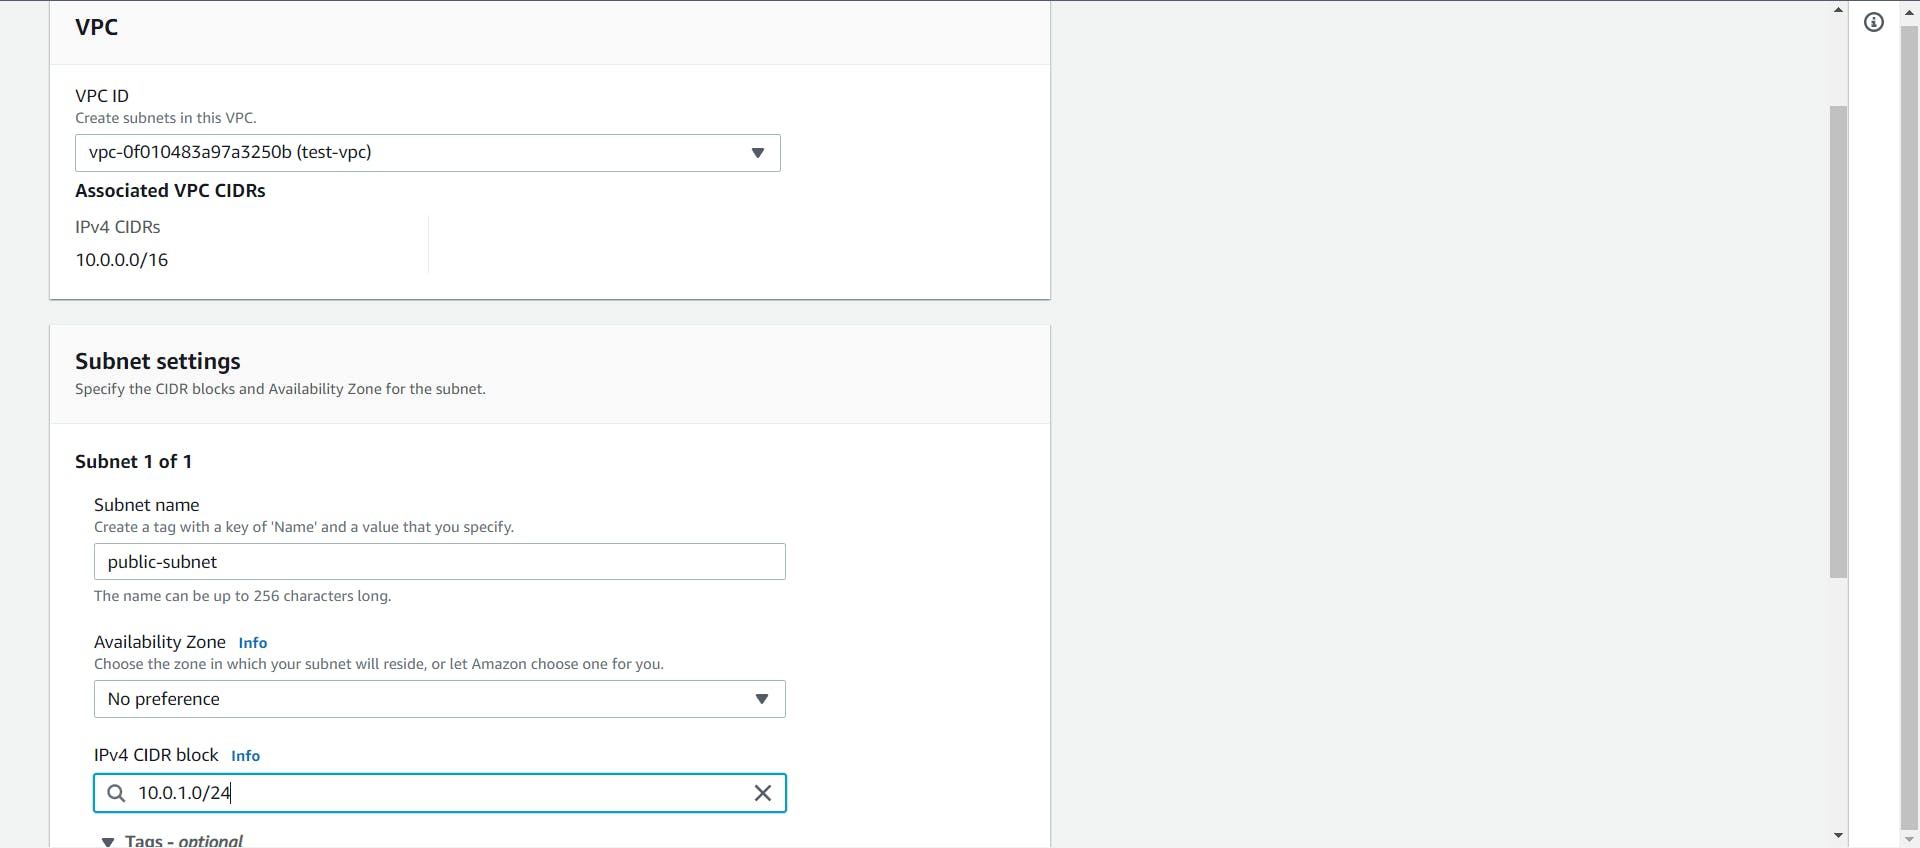
Let’s first create the public subnet. First, select the recently made VPC. You can give a name to the subnet to easily identify it, then select an IPv4 CIDR block for this subnet. Here, I am selecting 10.0.1.0/24 as the CIDR block.
You can also select the AZ in which you would like to create this subnet since a subnet always maps to one AZ.
Once done, click on the Create button to create the subnet.
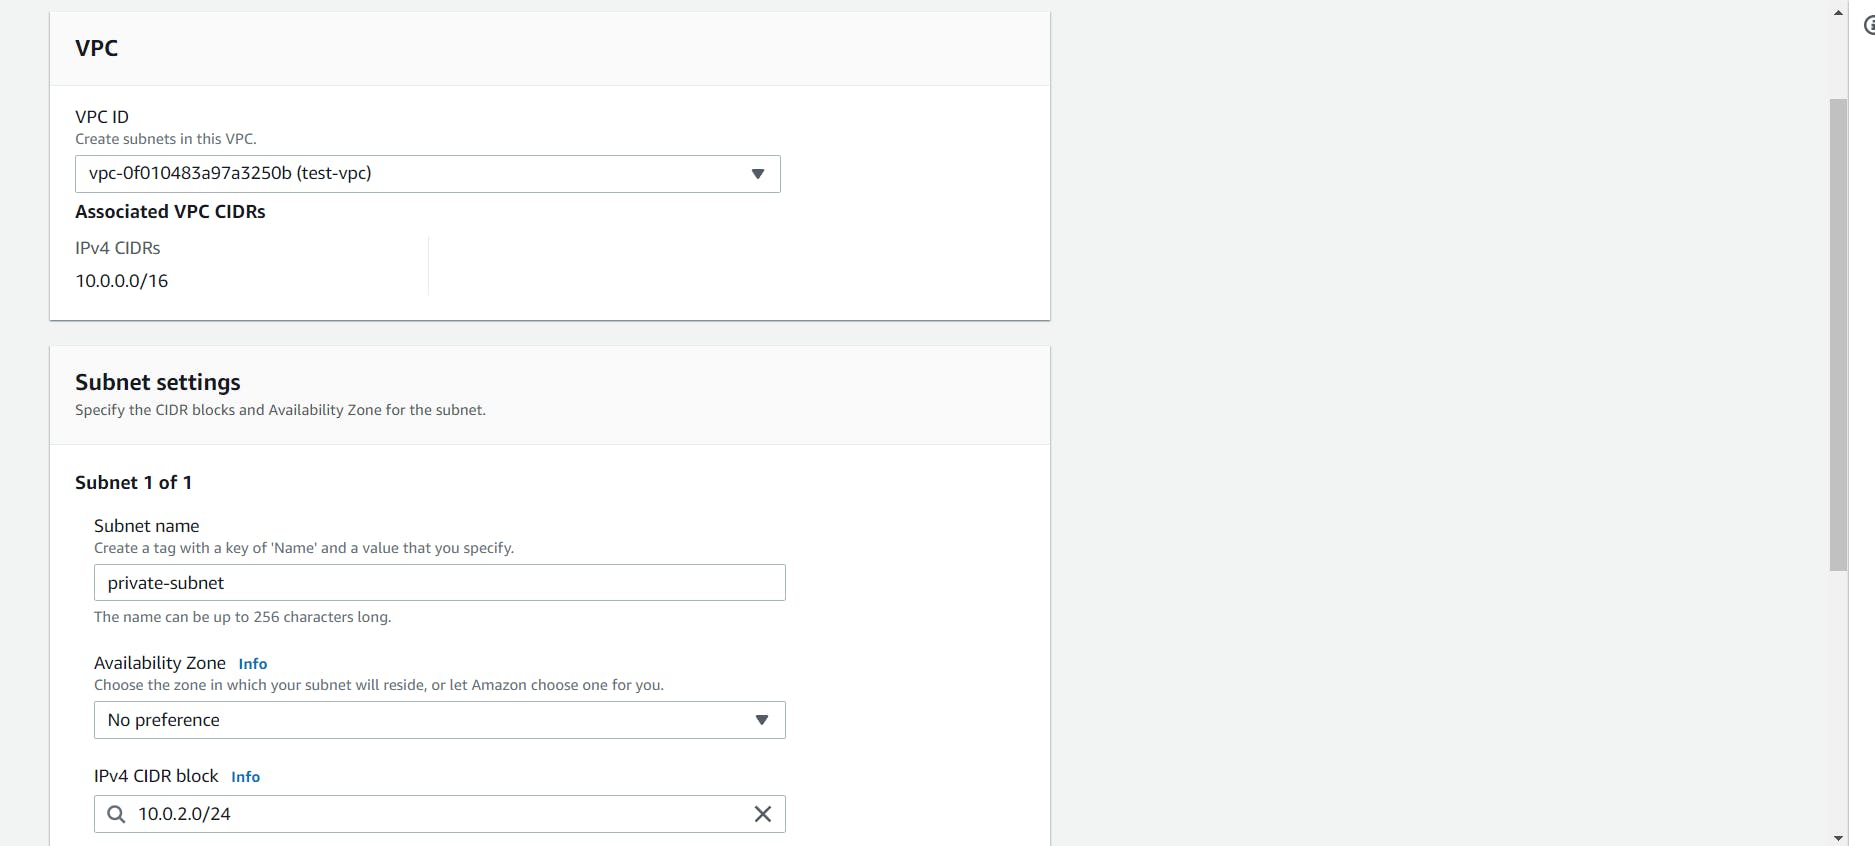
- Now we have to create another subnet which will be the Private Subnet.
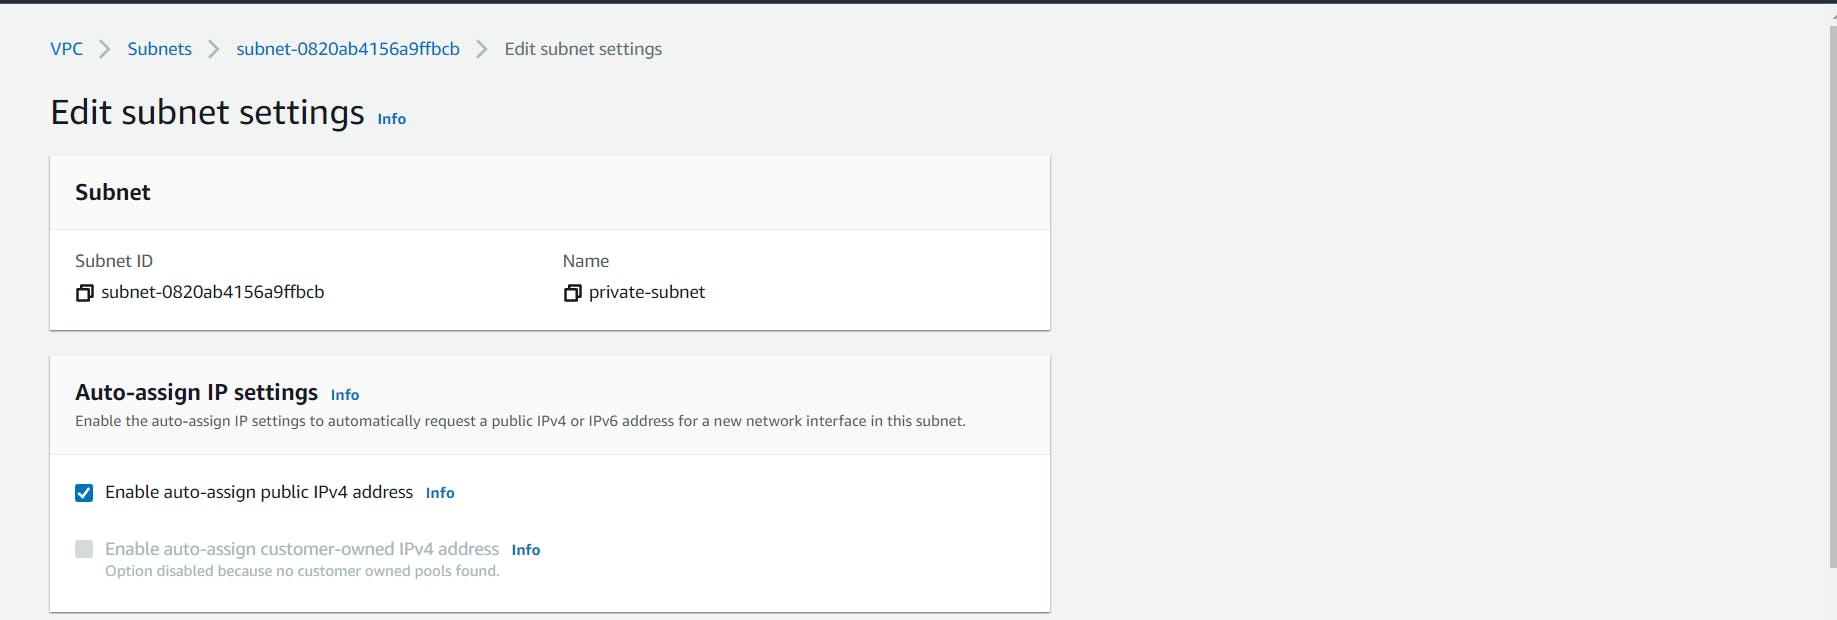
- By default, subnets have the Auto-Assign Public IP setting as disabled. Let’s enable this for our public subnet by selecting it and clicking on the Actions dropdown at the top and selecting Edit subnet settings. After enabling Auto-Assign Public IP, save it.
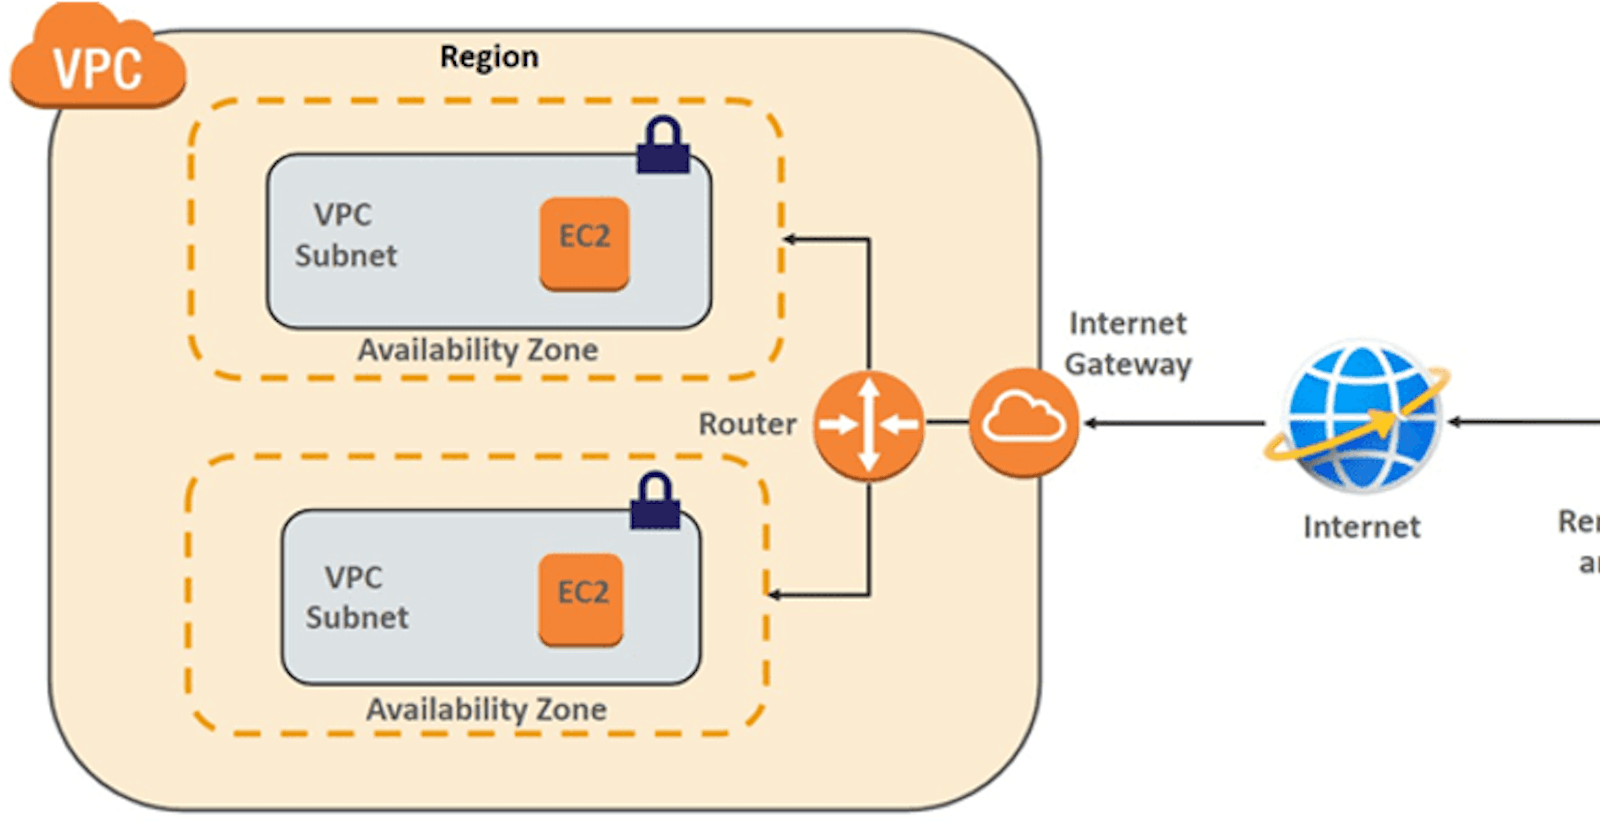
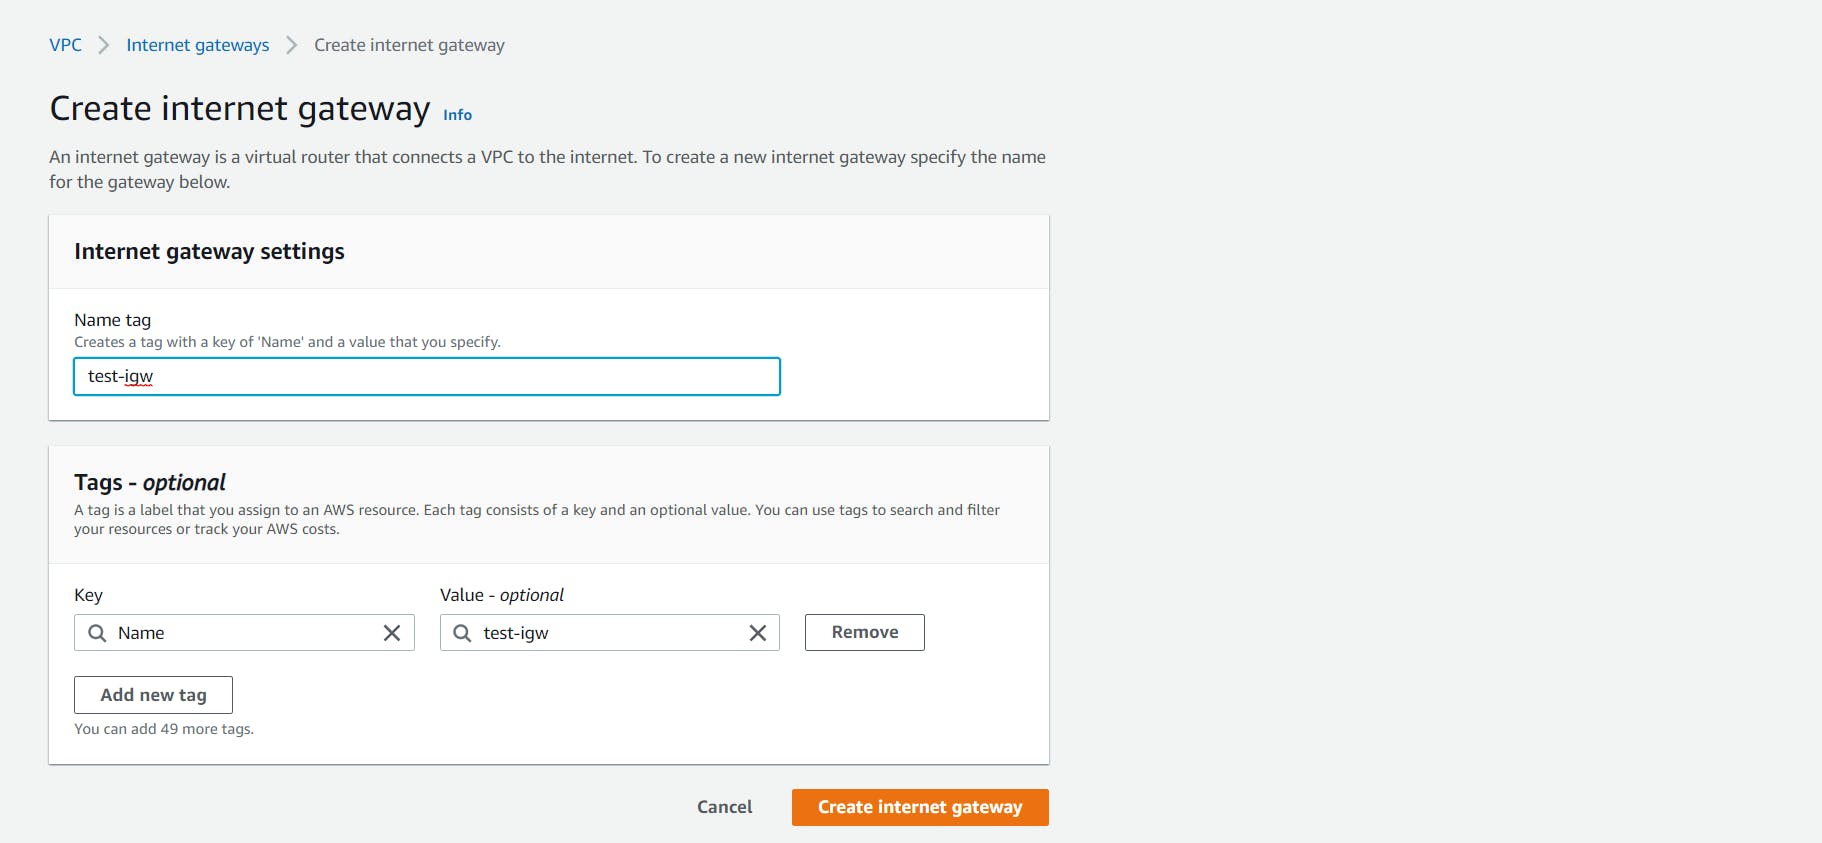
- Now we have to create an Internet Gateway. Without an internet gateway attached, any instance created inside that VPC cannot be accessed via the internet.
To create an internet gateway go to the Internet Gateways tab in the left sidebar and click on Create Internet Gateway at the top. Give a name to your internet gateway and click on the Save button.
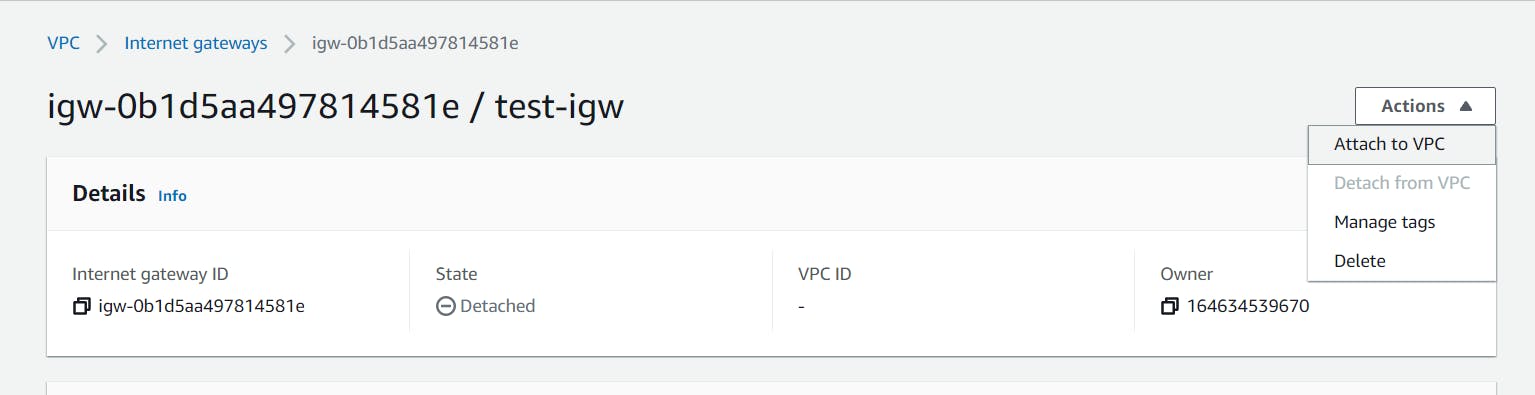
- You need to attach the internet gateway with your custom VPC. You can do this by selecting it, clicking on the Actions dropdown at the top and selecting Attach to VPC.
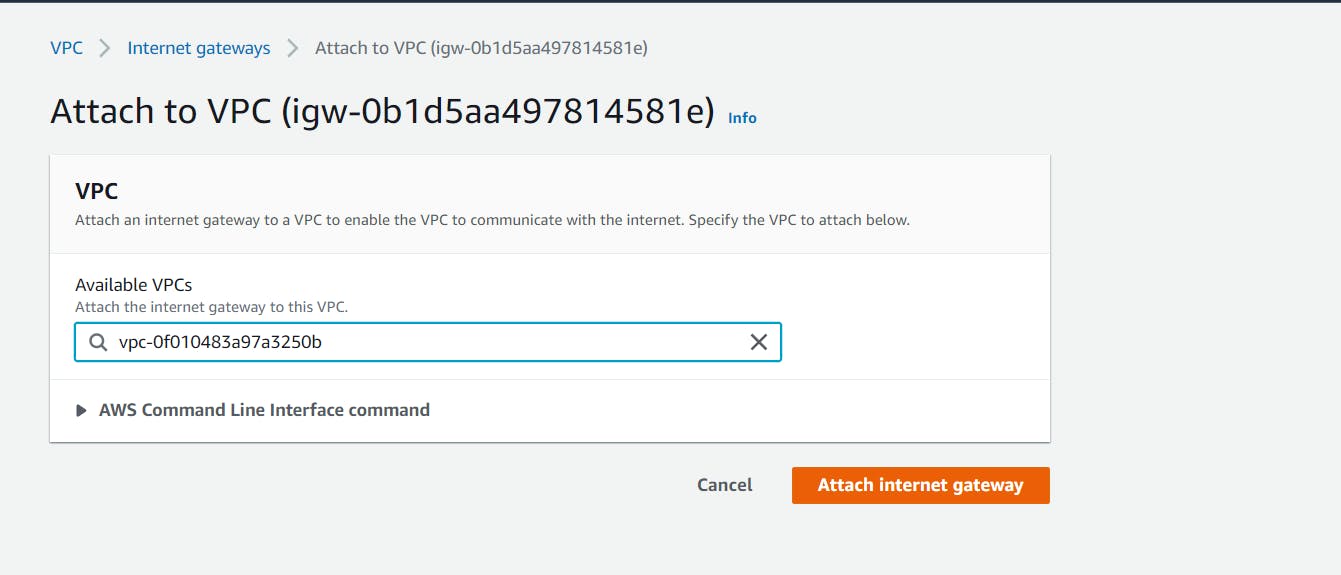
Then select your custom VPC and click on the Attach button.
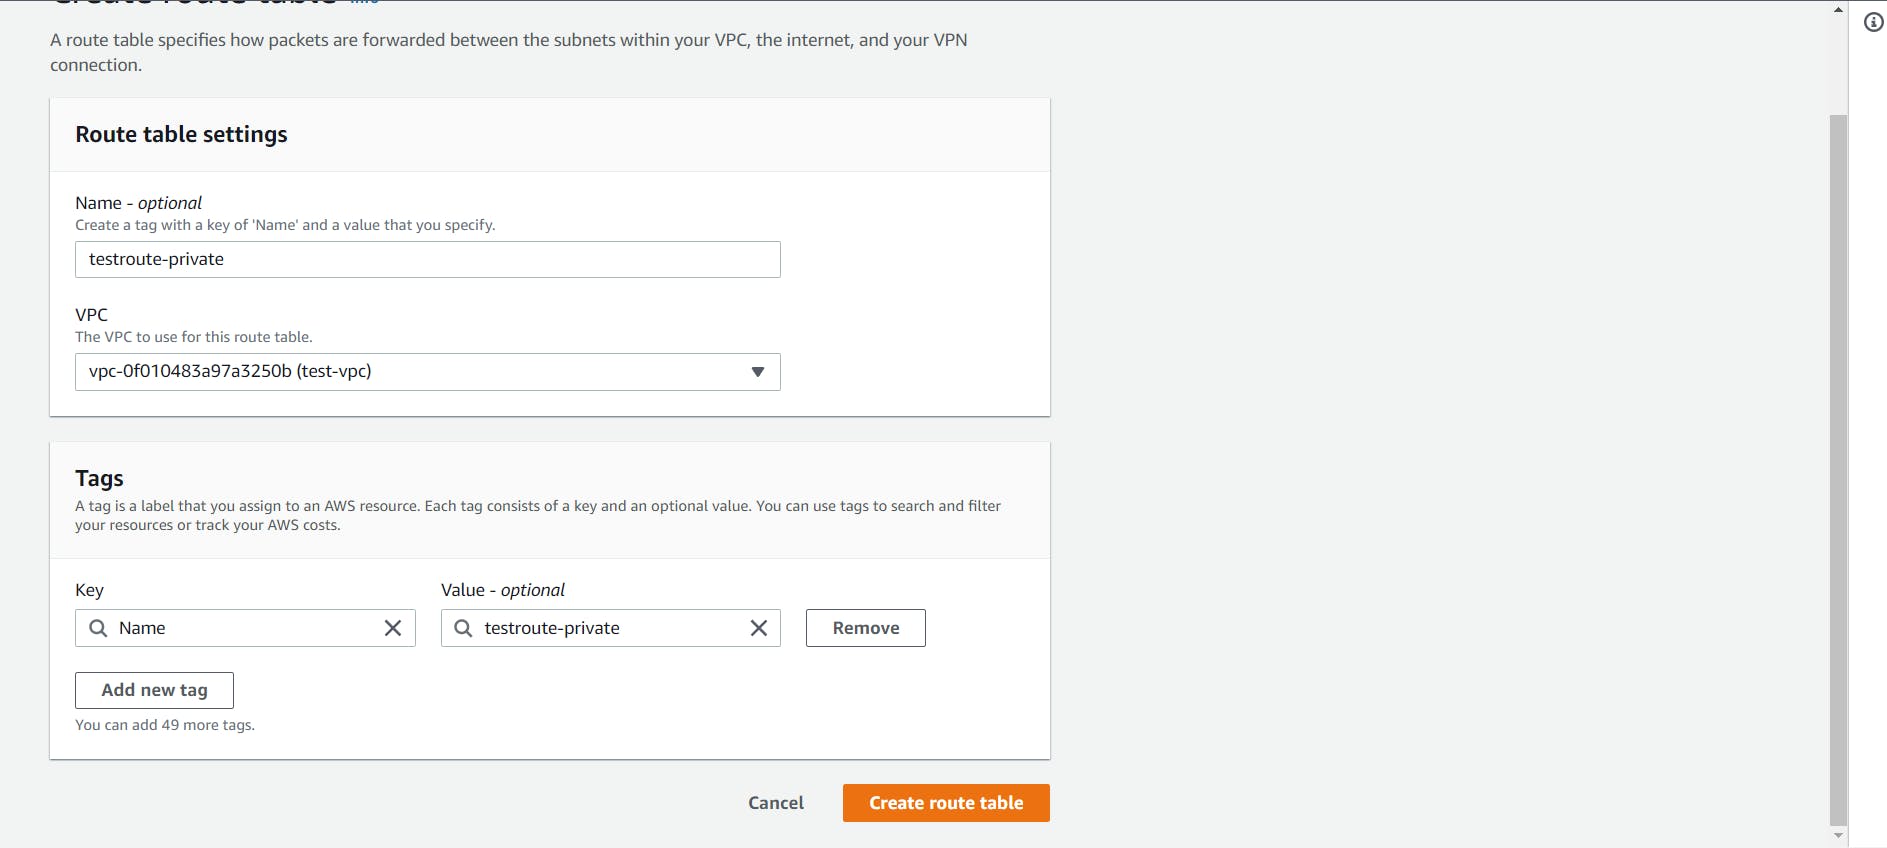
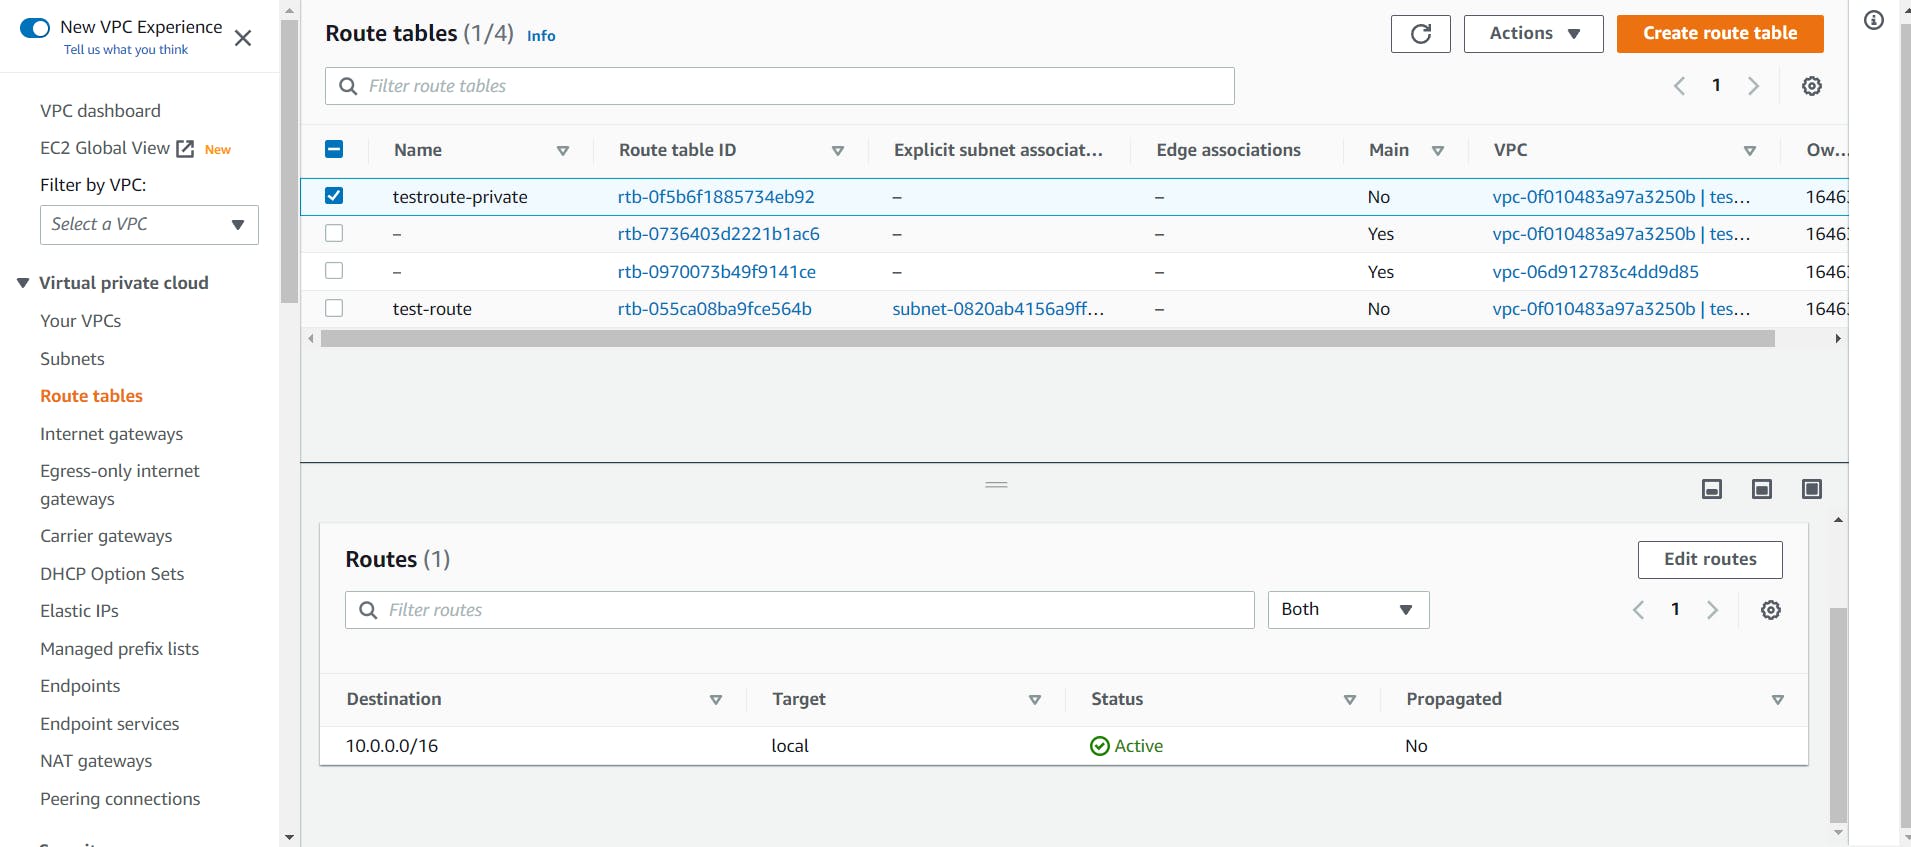
- Now we have to create a Route Table
For security reasons, it is recommended to leave the main route table as it is. Hence, we will be creating a new route table for our custom VPC and allow internet access to our public subnet through it.
Let’s head to the Route Tables tab from the left sidebar and click on the Create route table button at the top.
Give a name to your route table, select the custom VPC and click on the Create Route Table.

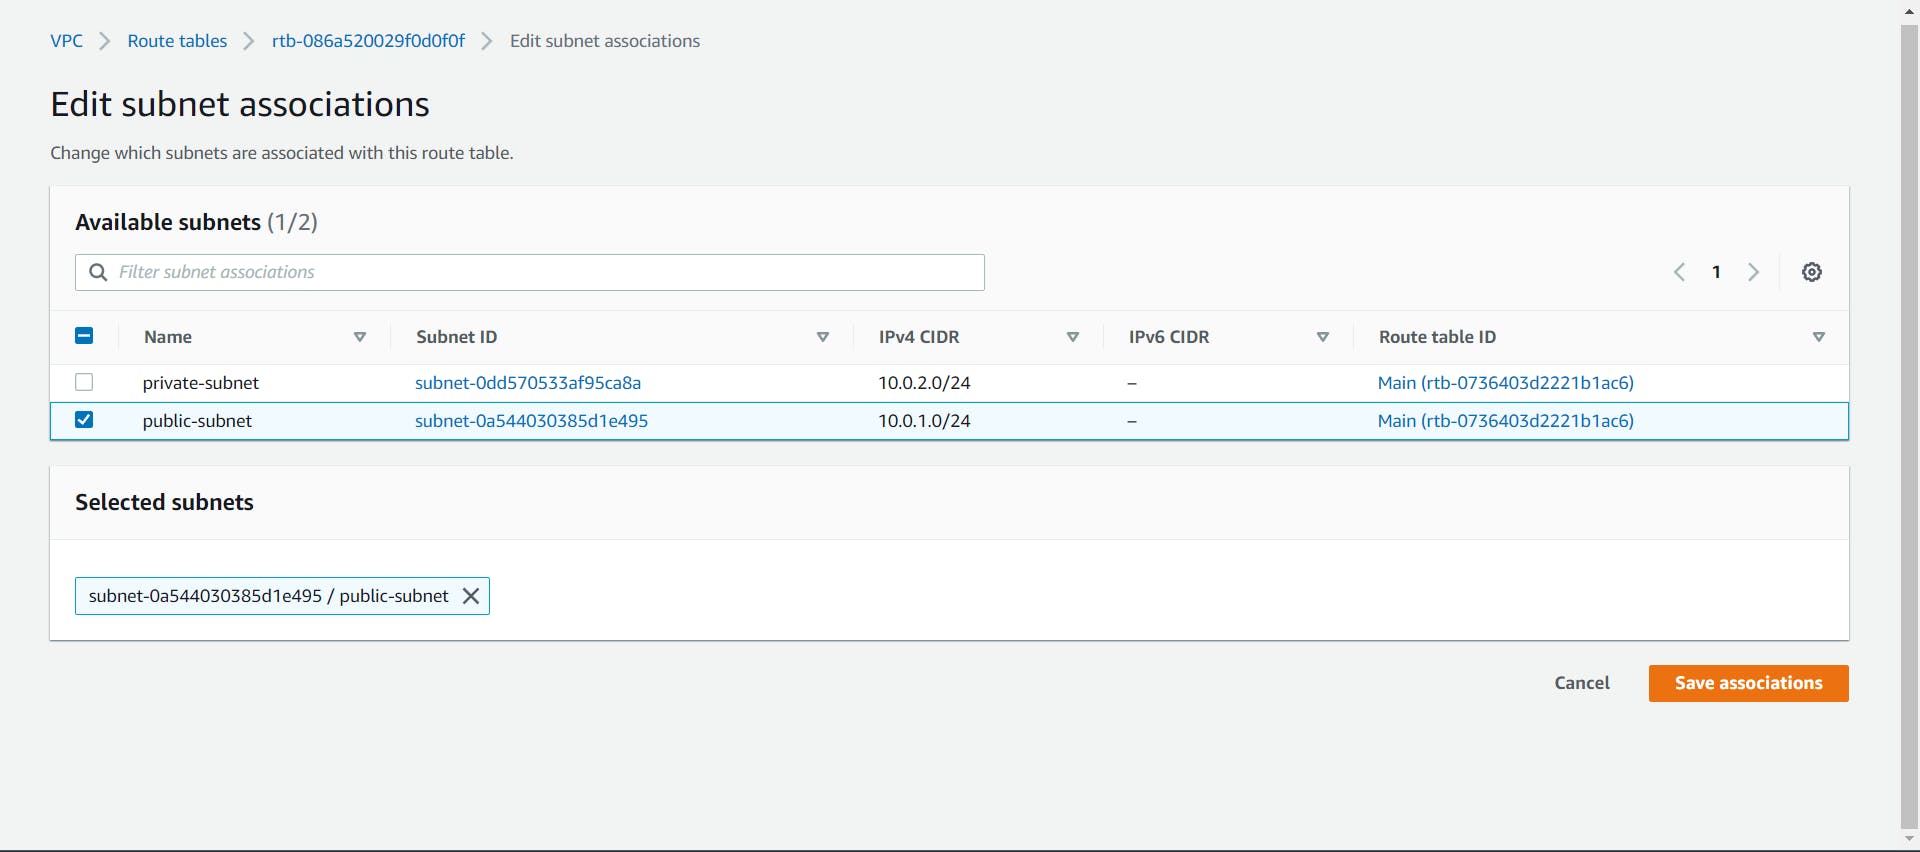
- Let's associate the public subnet with the custom route table by selecting it and navigating to the Subnet Associations tab at the bottom.
Click on the Edit subnet associations and select the public subnet and click on the Save button.

- Now create another route table for the private subnet.

- Now to allow internet access to our public subnet we need to create a new Route for our custom route table.
Select the custom route table and navigate to the Routes tab at the bottom. Click on the Edit Routes button and add a new Route with the destination as 0.0.0.0/0 i.e. the Internet and Target as the attached internet gateway.
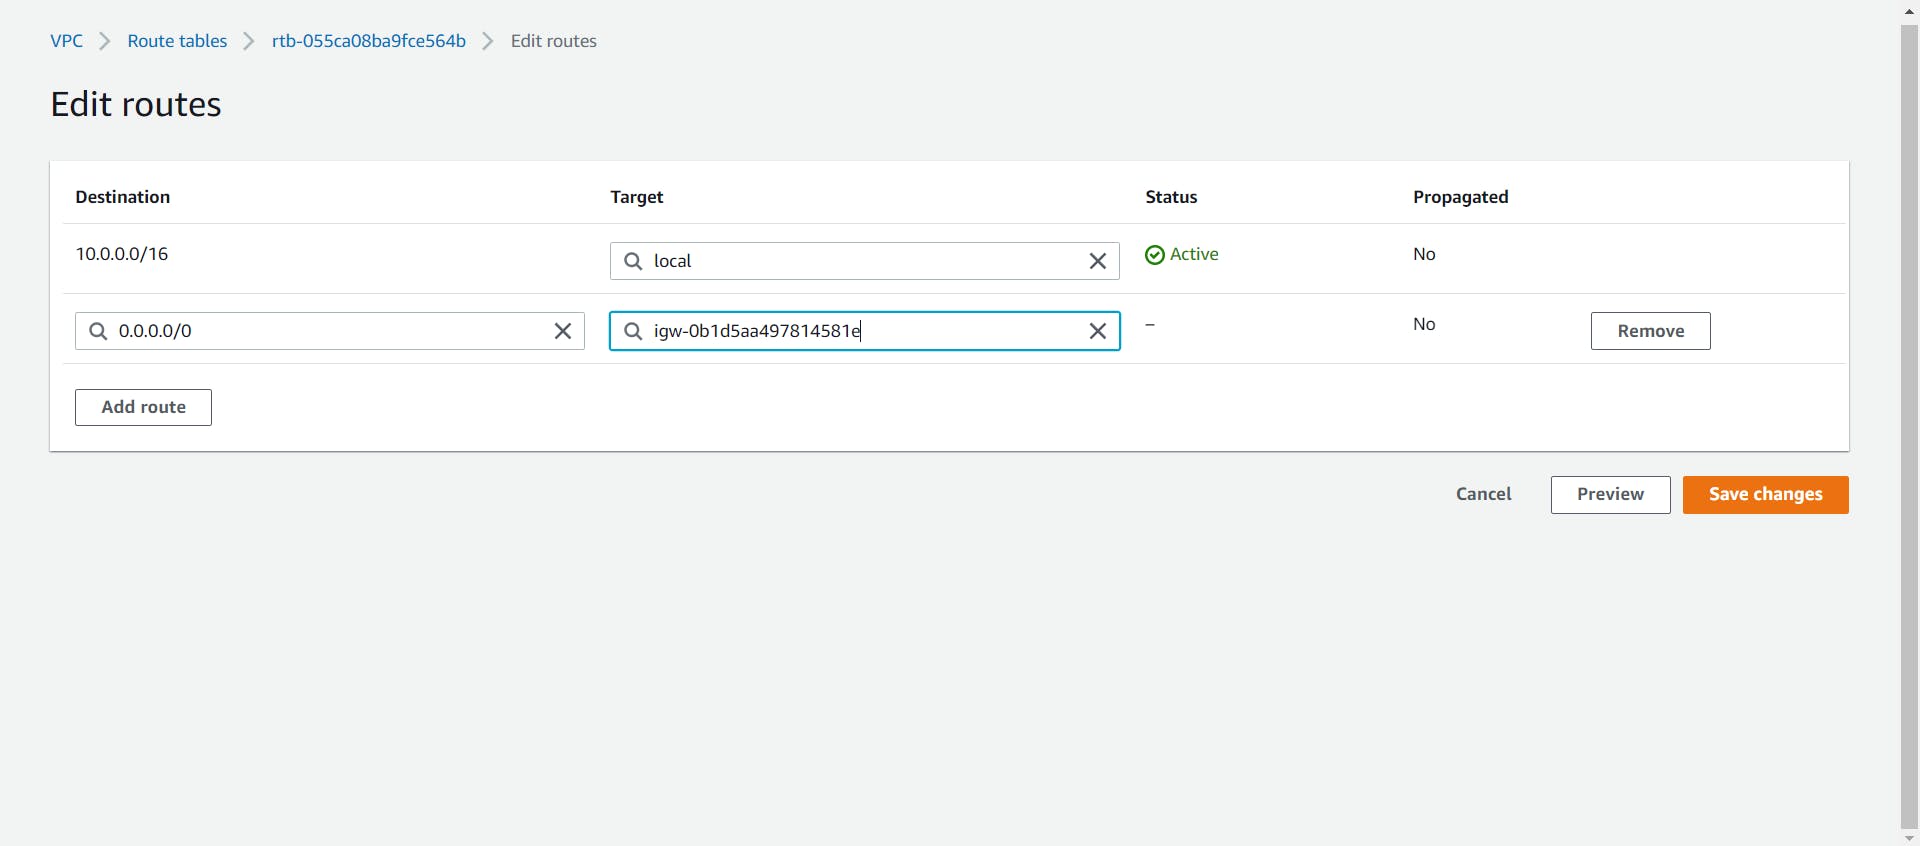
Save the Routes and now your public subnet has internet access.
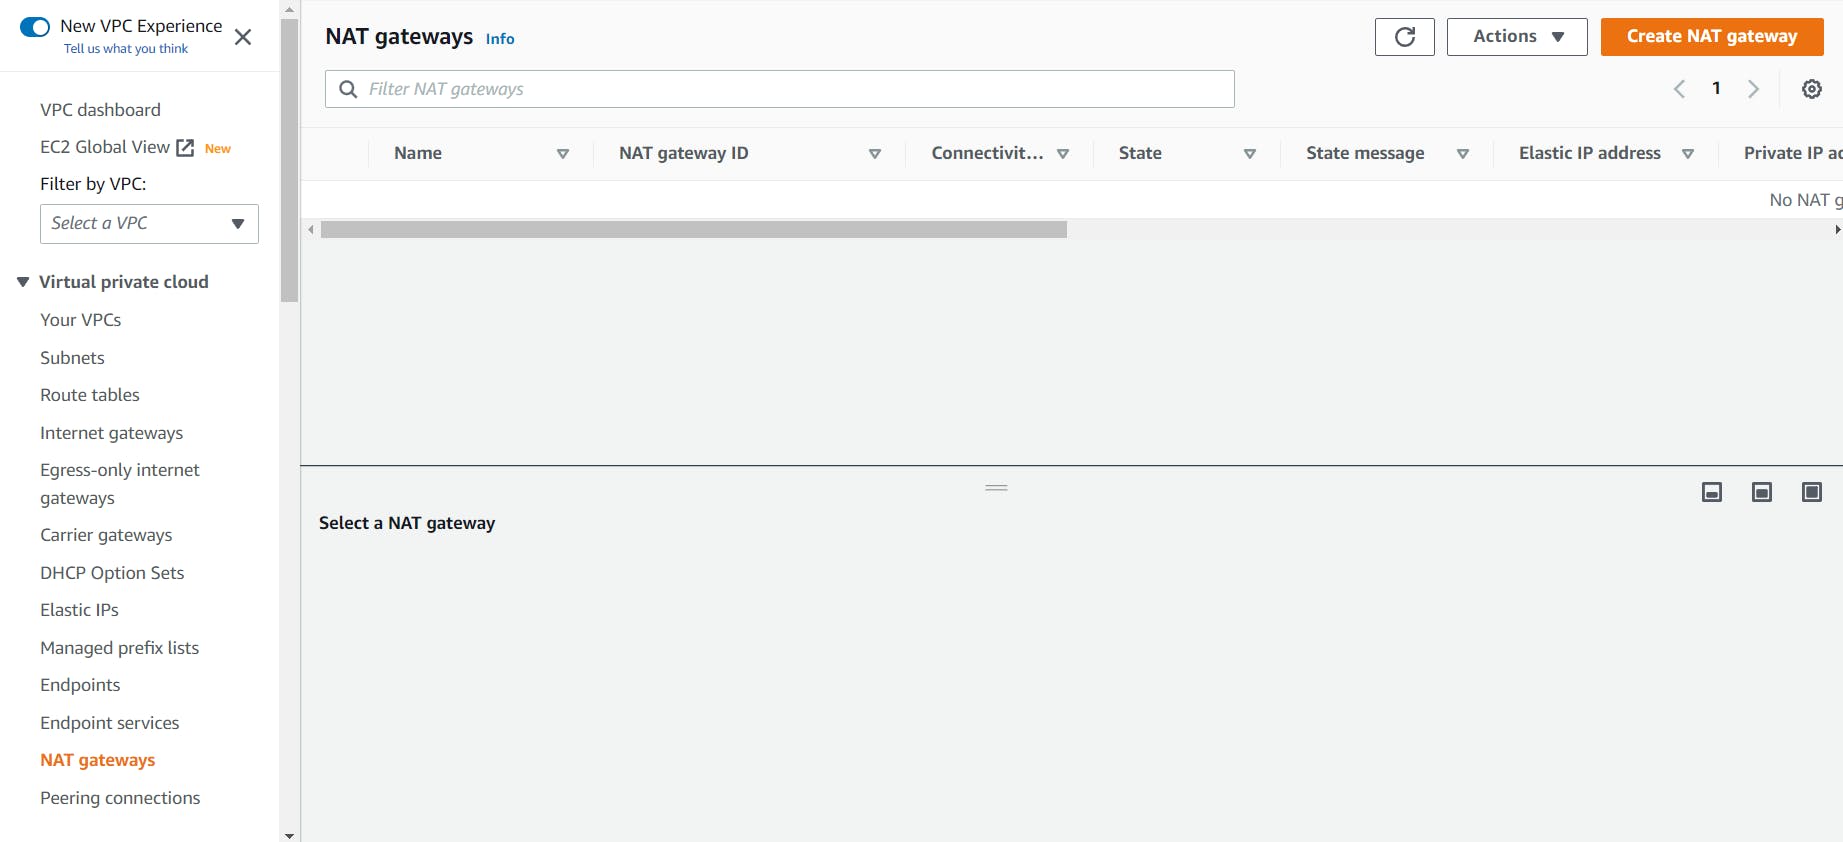
- Now we have to create a NAT gateway.
Select the NAT gateways from the side menu bar and click on Create NAT gateway.
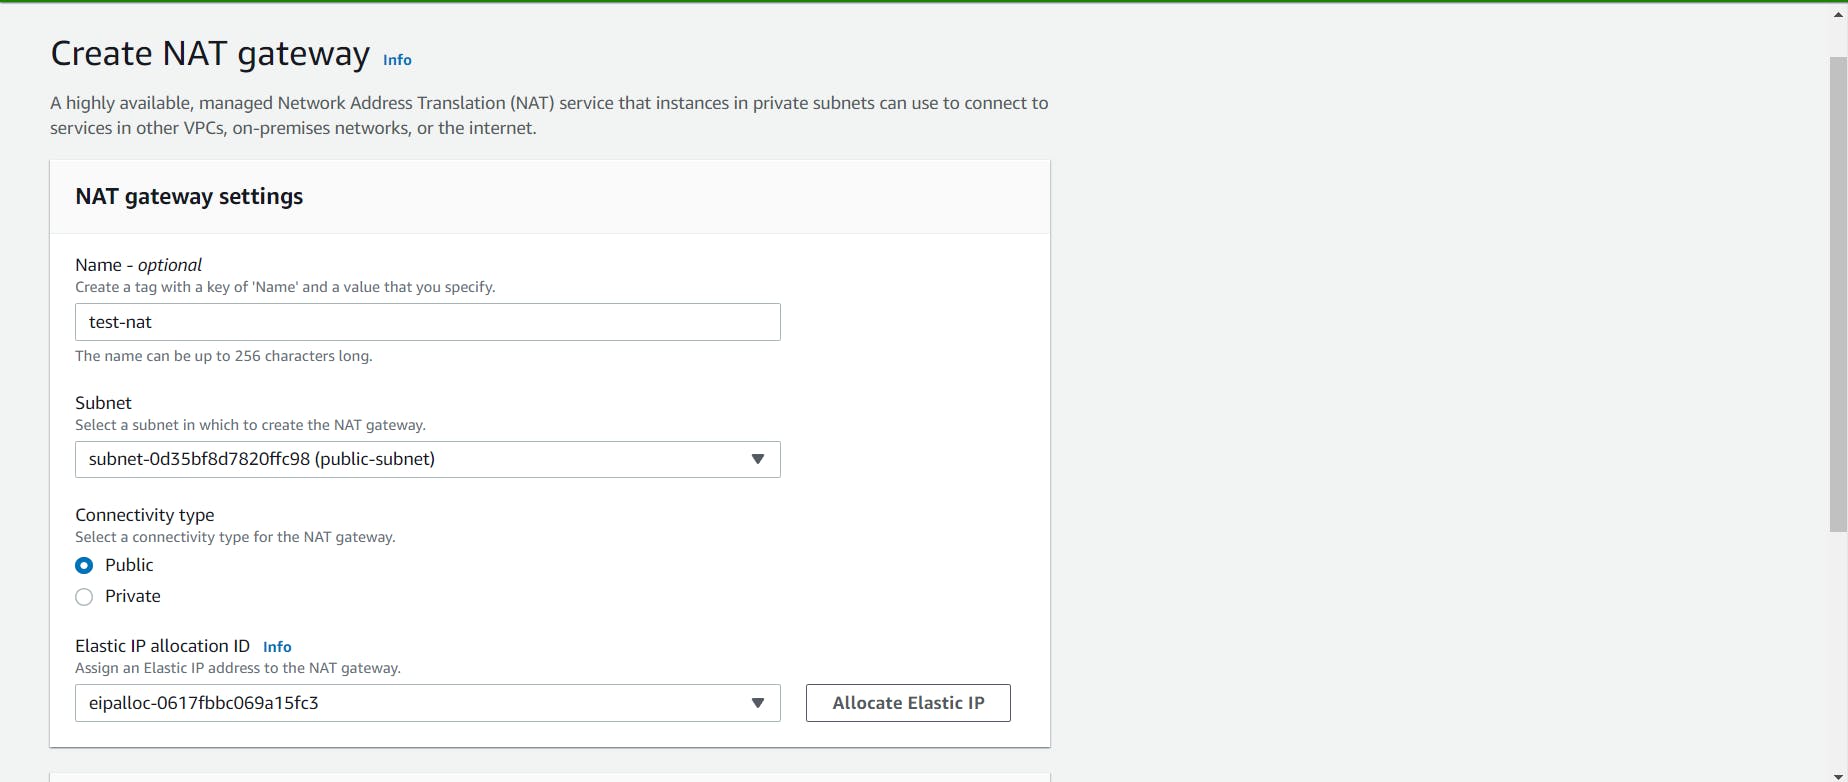
Give a name to your NAT gateway, select the custom public subnet and assign the elastic IP. Click on the create button.
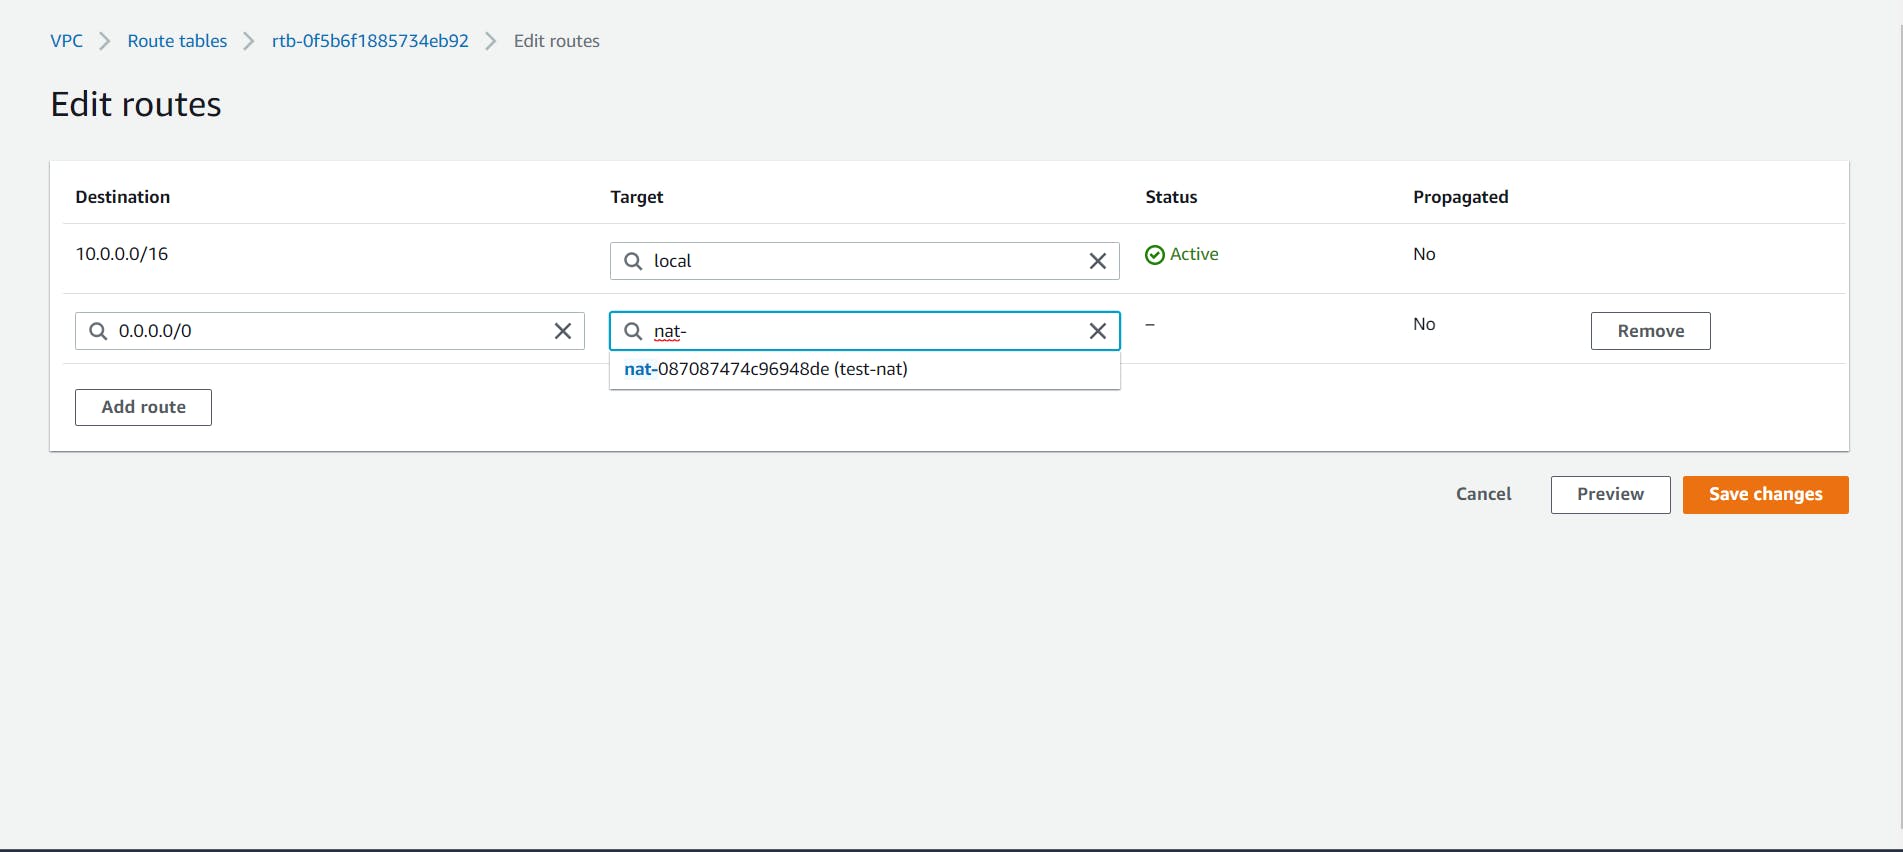
- Now we have to move to the Route Table and select the custom-made Private route table and click on the Edit button.
Add the custom-made NAT IP to the private route.
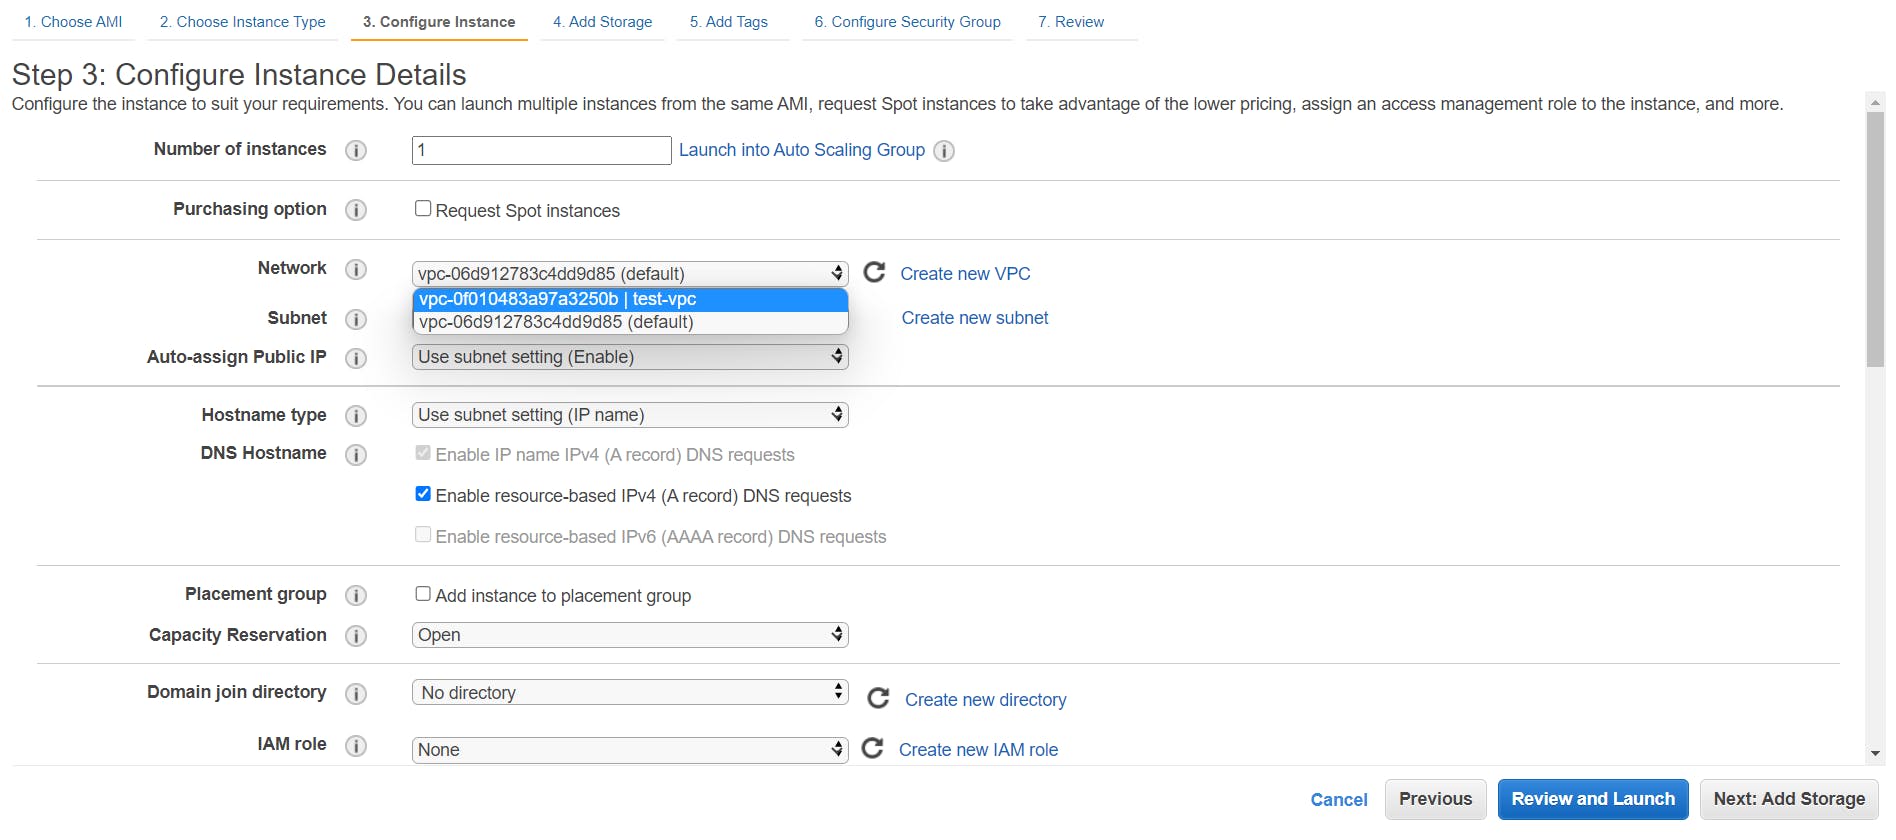
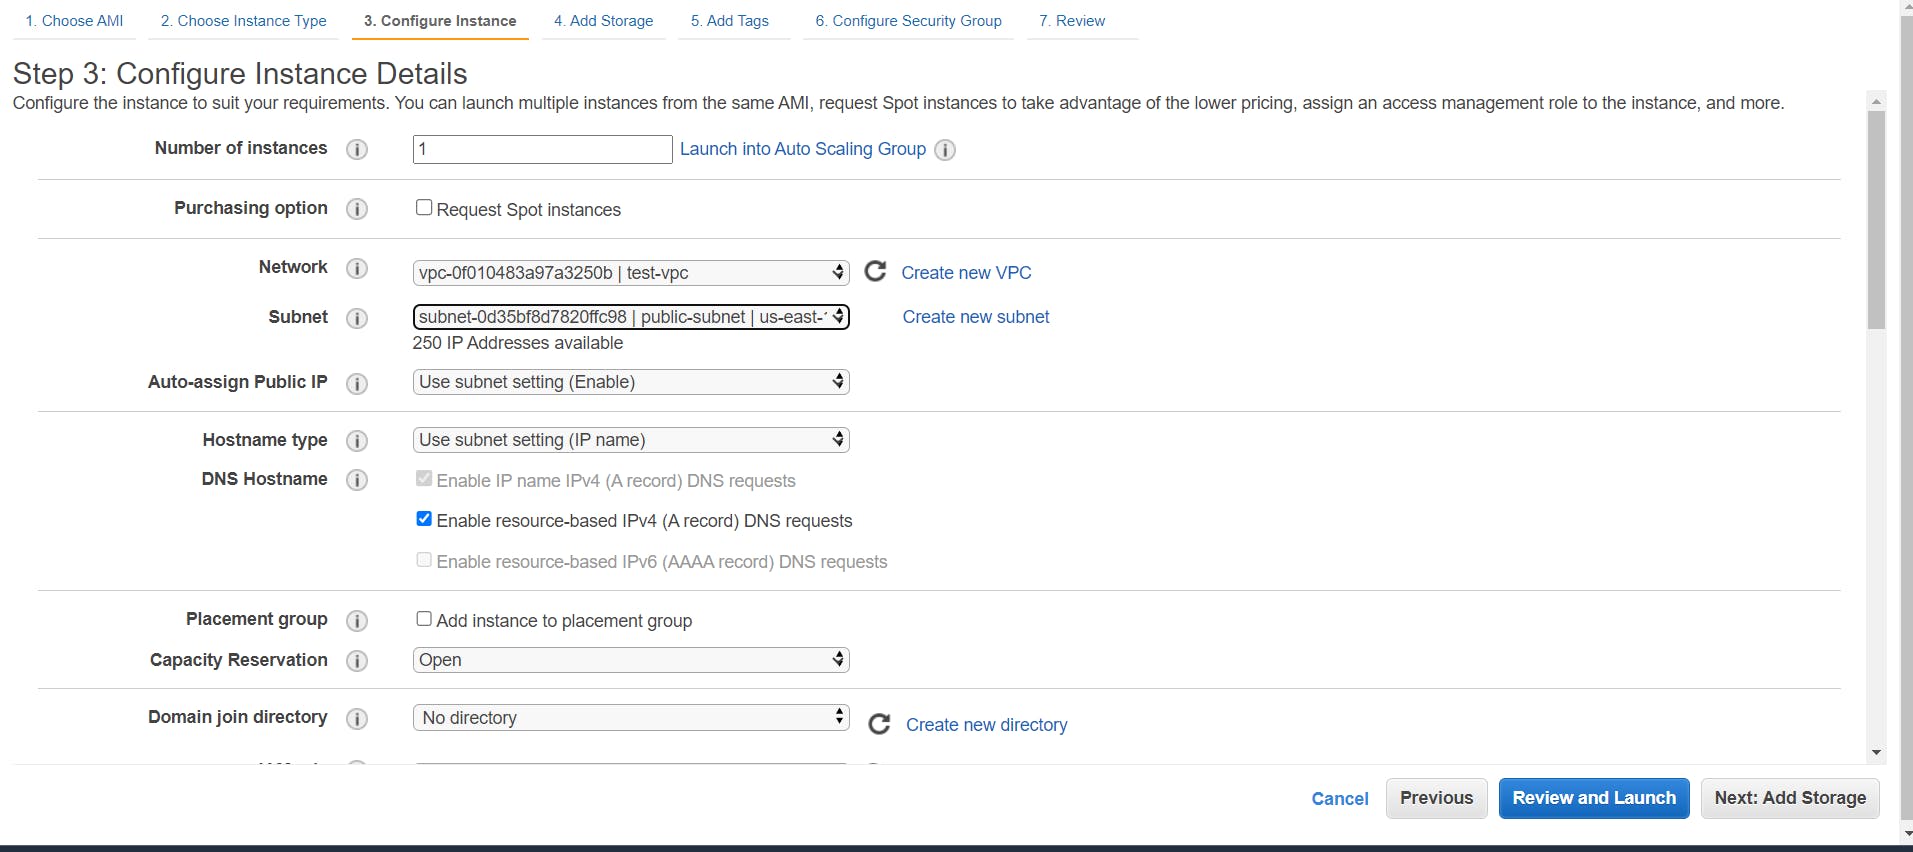
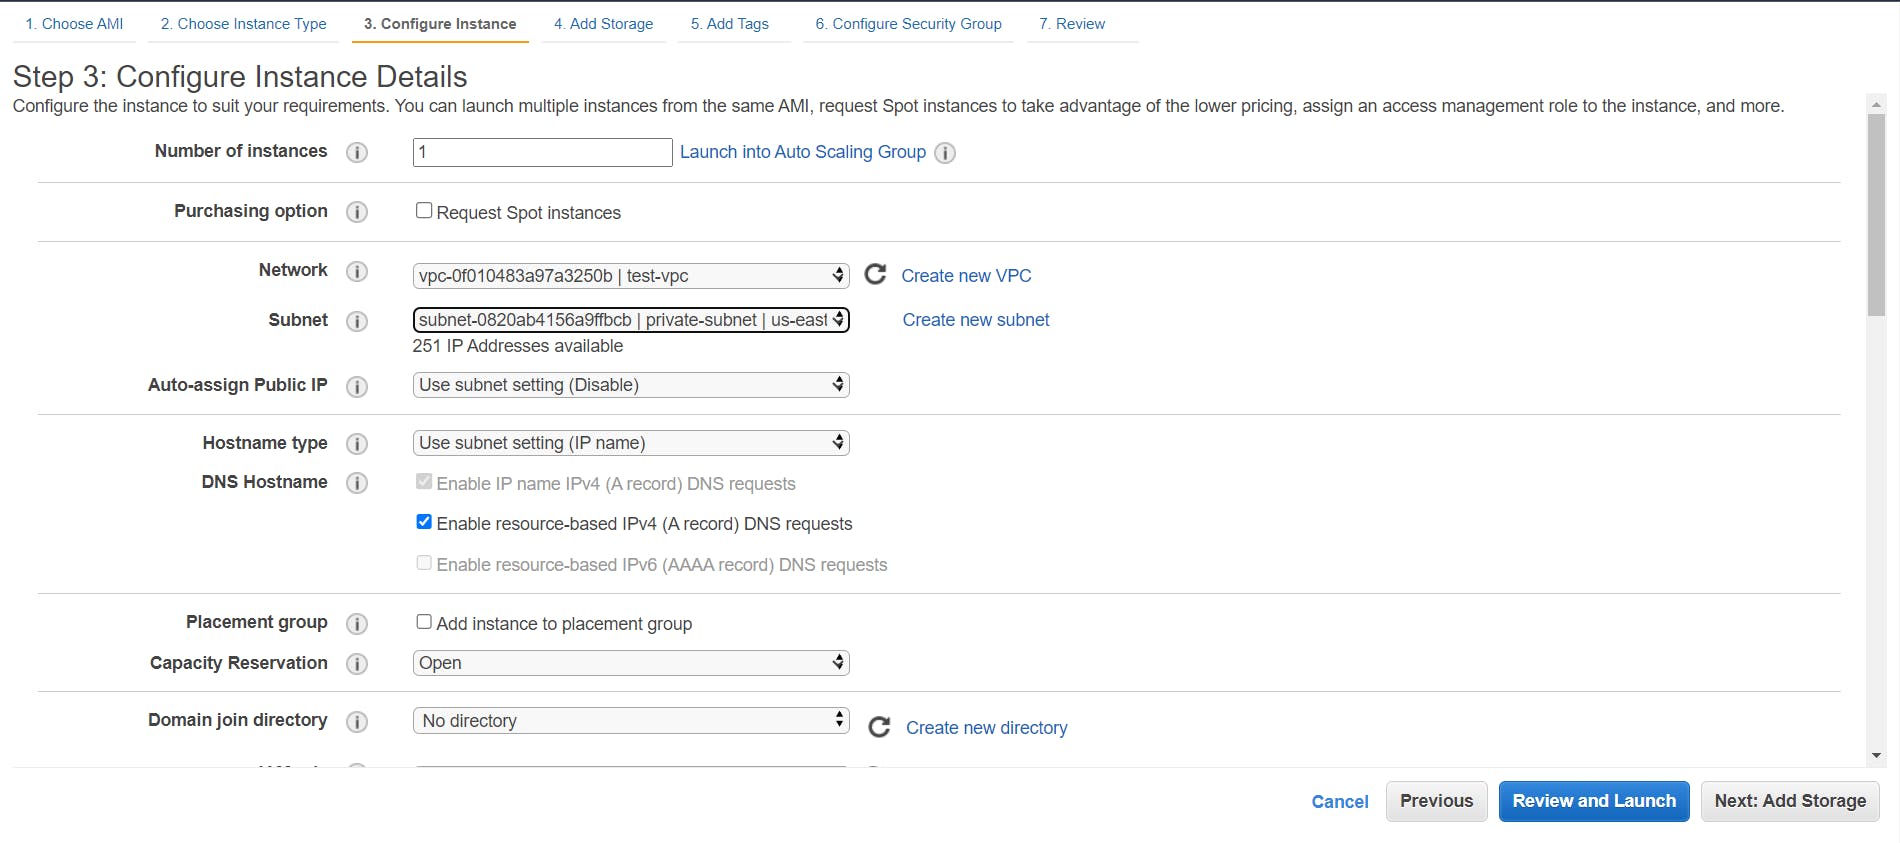
- It’s time to launch our instances. Head over to the EC2 dashboard and click on Launch Instance. Select the custom VPC as the network and the public subnet as the subnet. Now, in the field just below the subnet, you can see the field Auto-assign Public IP and its value is set to the subnet setting.
Since in our subnet, we enabled this option so the default option here is Enable.
- Now, to create a private instance, select the same AMI and instance type. Just this time select the private subnet to launch the instance.
SSH into Instances
It’s time to SSH into your instances but since your private instance does not have a public IP address you won’t be able to SSH into it directly from your system.
So let's first SSH into the public instance.
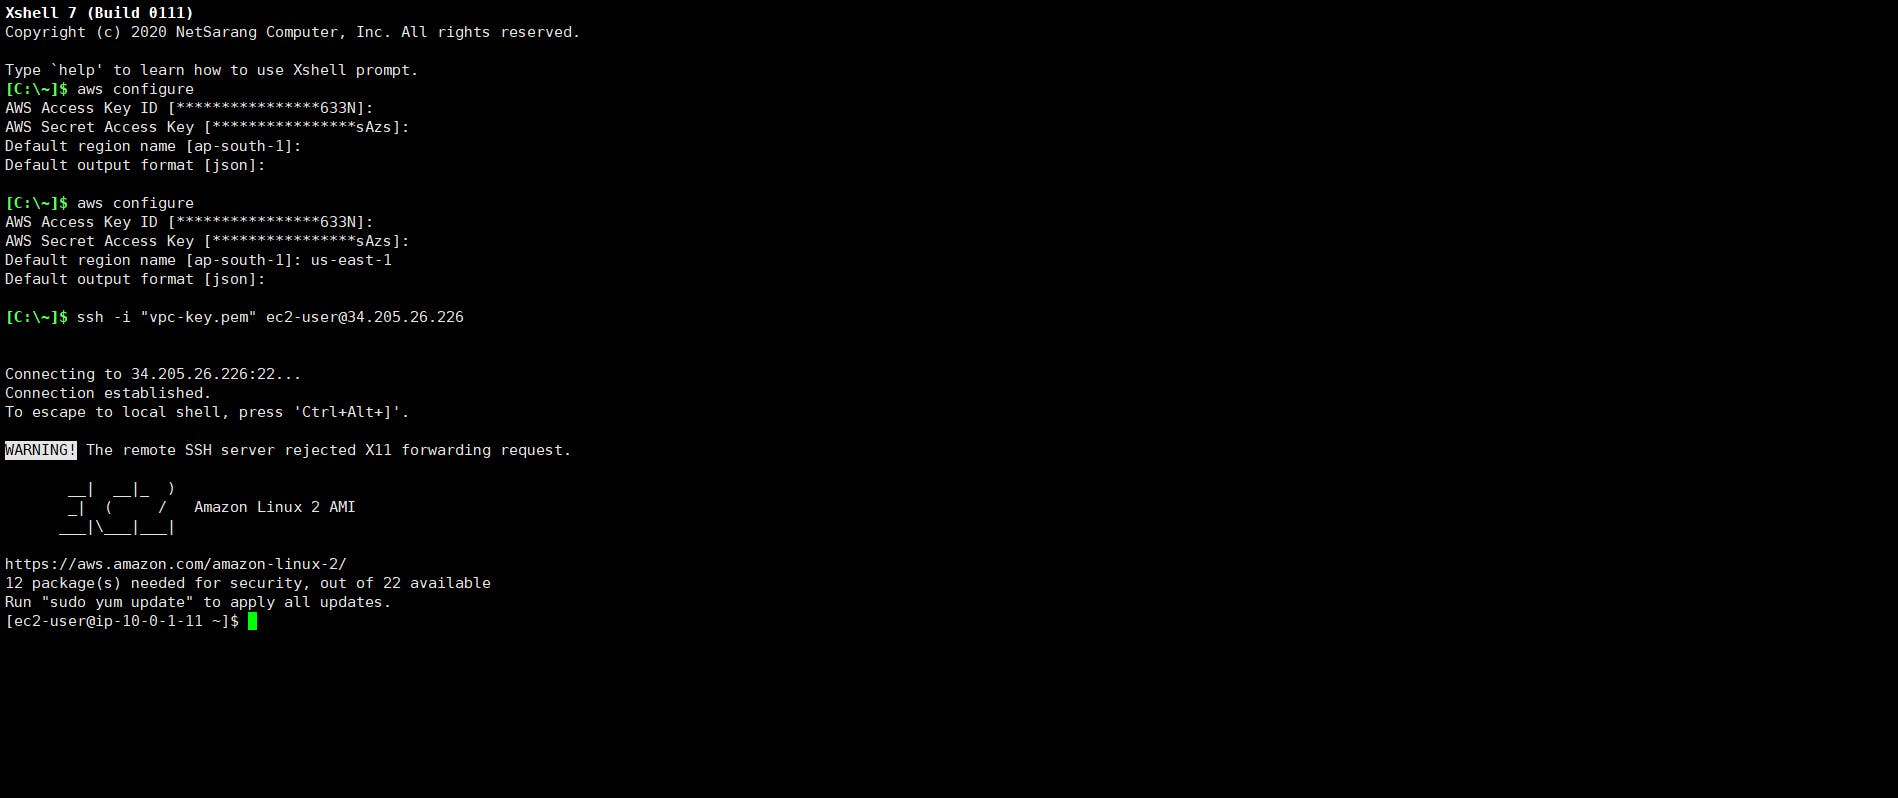
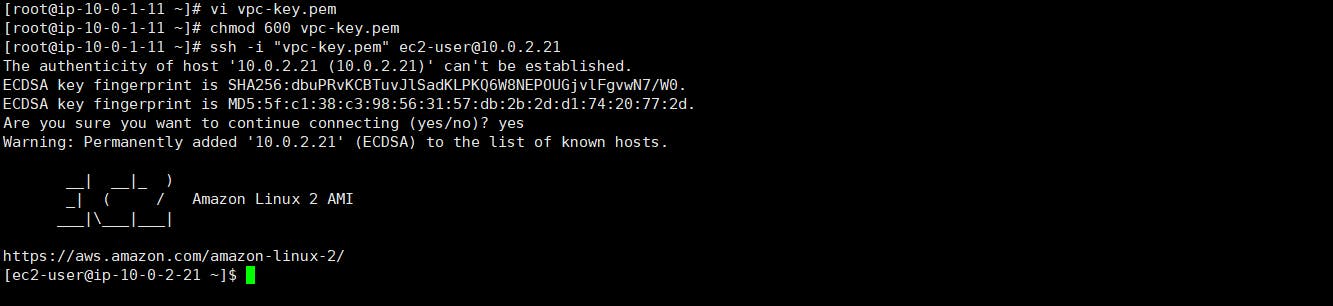
Now, that we are inside the public subnet we should be able to SSH into our private subnet since by default instances within a VPC can communicate with each other.
To SSH, we need the private key, so create a .pem file and copy the contents of your downloaded PEM file in it. You can do create a new file by typing the following commands
vi private.pemto open VIMPress
ito enter insert mode of VIMCopy the content of your downloaded PEM file and paste in the terminal.
Press Escape key to exit the insert mode and type
:wqto save the file and quitNow, type
chmod 600 private.pemto limit permissions of the file
With this, you have successfully created a custom VPC.
VPC Peering
A VPC peering connection is a networking connection between two VPCs that enables you to route traffic between them using private IPv4 addresses or IPv6 addresses. Instances in either VPC can communicate with each other as if they are within the same network.
Here we have to create 2 VPCs to connect them with each other.
- Previously we had created One Vpc.
- Using the same steps we have to Create another VPC.
- We can create the VPC in any region but here we will be creating the VPC in the same region as the first VPC
- The CIDR range should be always different from that of the First VPC.
After creating another VPC successfully.
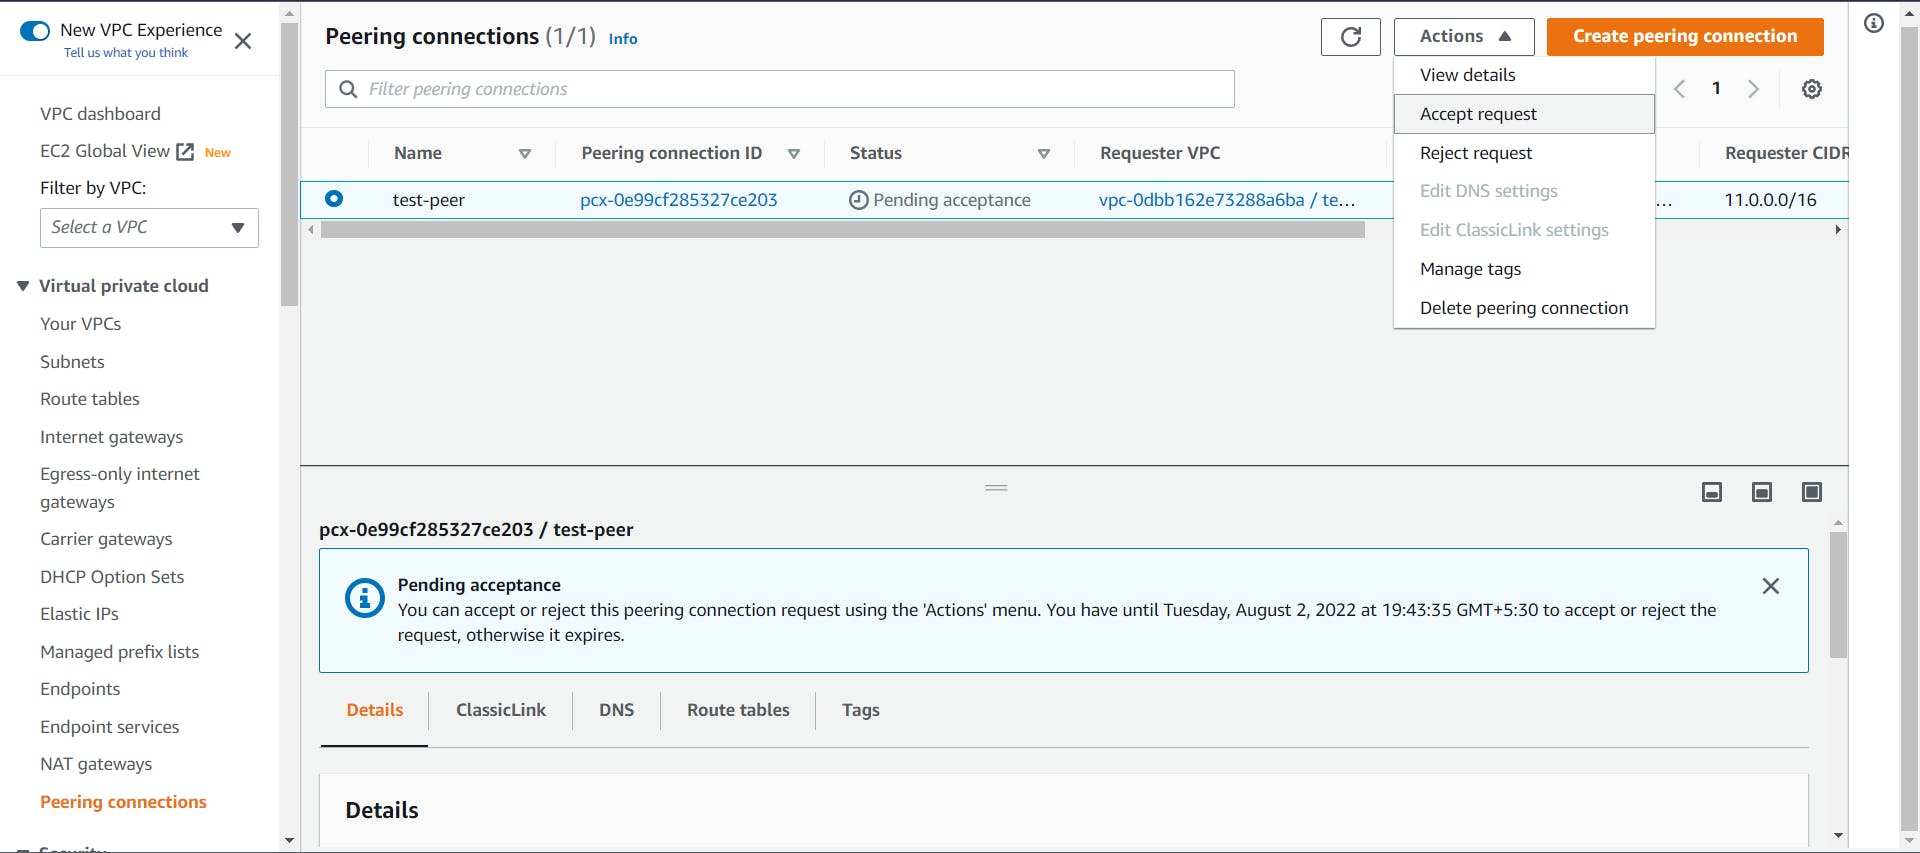
- Select the peering connections from the side menu bar. Click on the Create Peering connection.
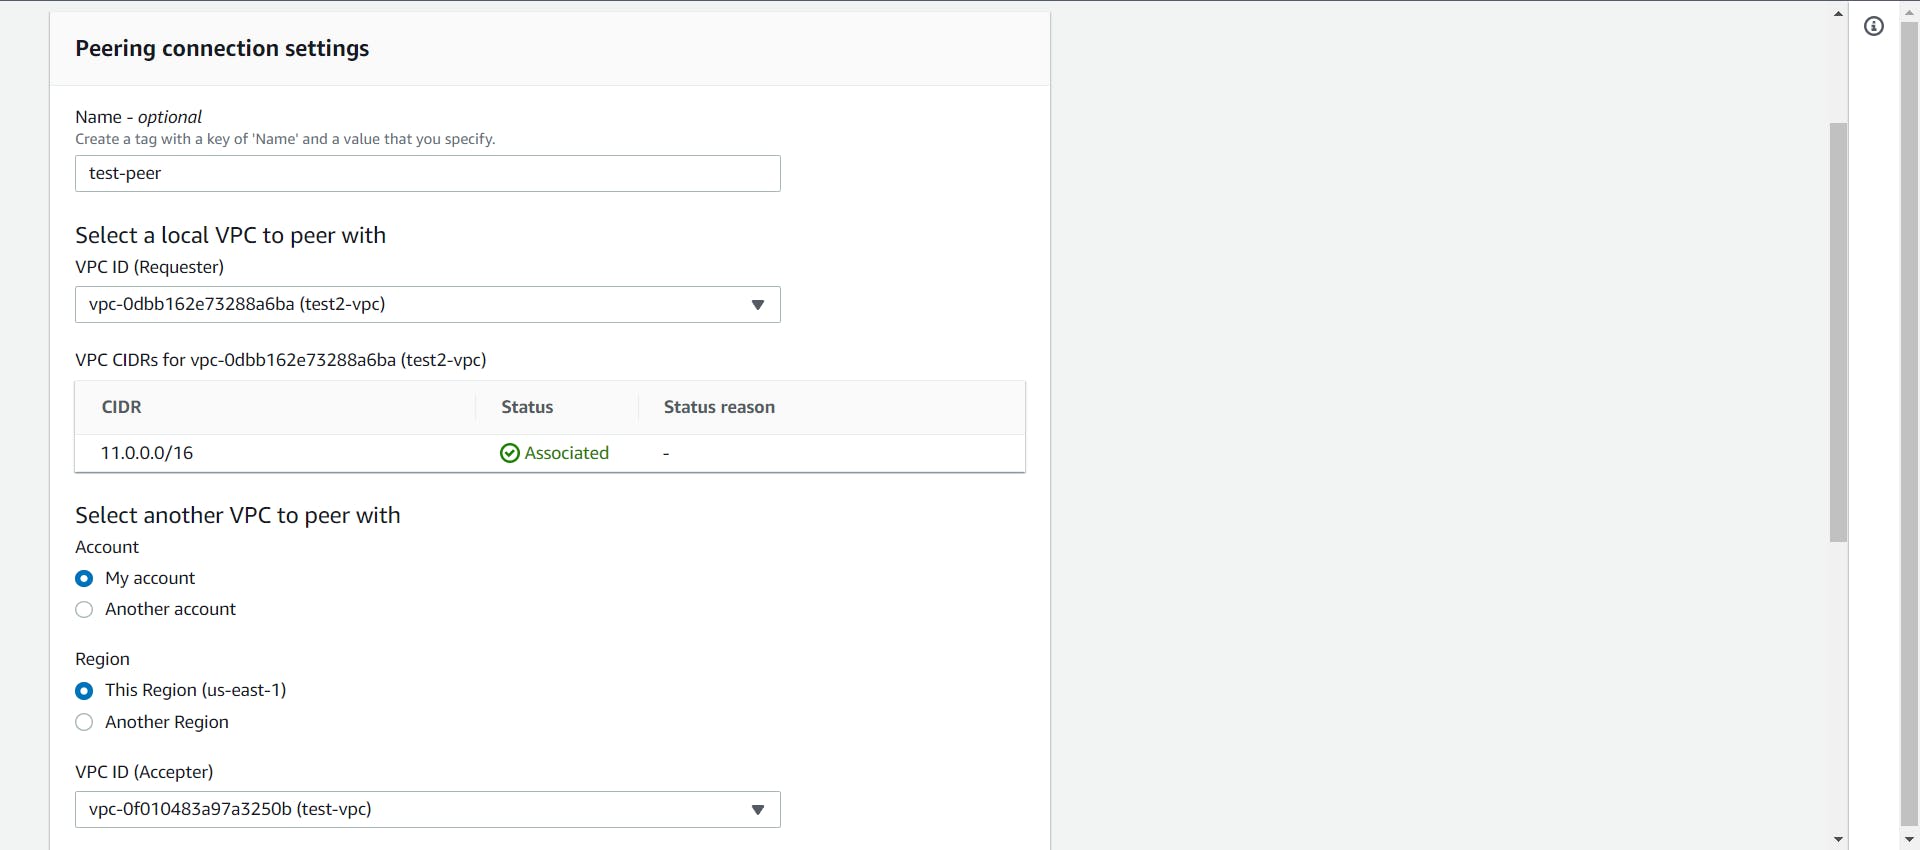
- Give a name to the Connection, Select the requester as one VPC and the Accepter as another VPC. Select "Create Peering Connection".
- Go back to the Peering Connection page, Select the created connection go to actions, and select "Accept Request"
- Now we have to Modify our Route tables.
Select the "Route Tables" from the side menu bar. Select the public Route table which we made for our first VPC, and Edit Route to add the newly created VPC's CIDR range.
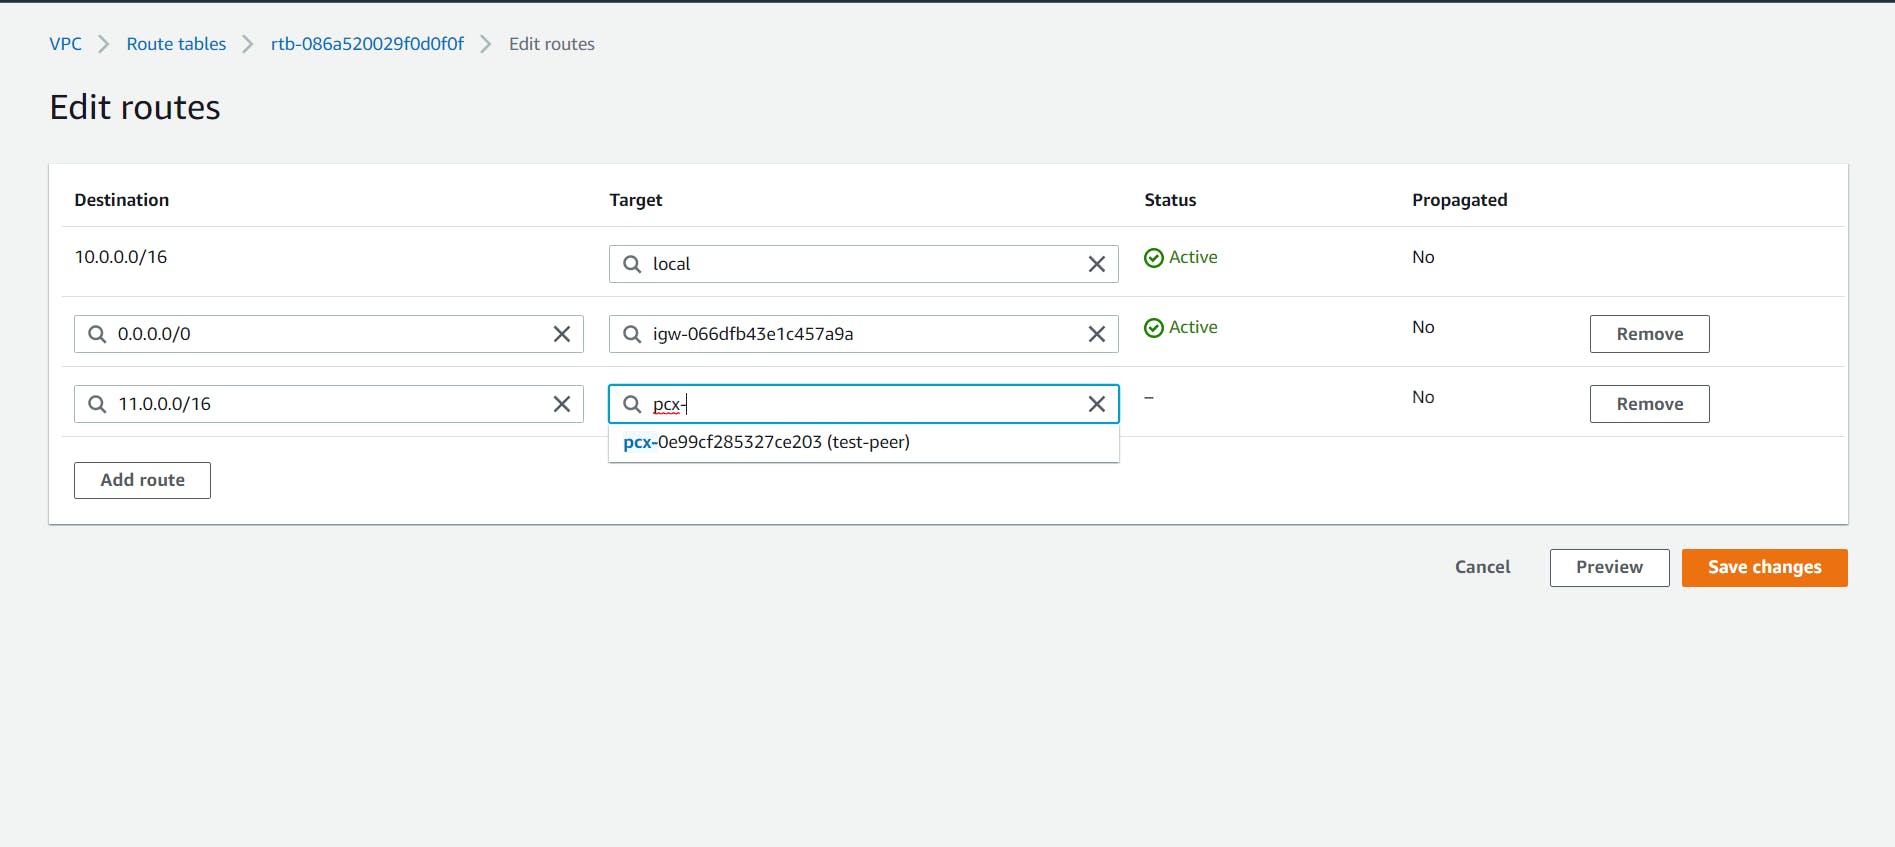
Similarly, Edit the private route table.

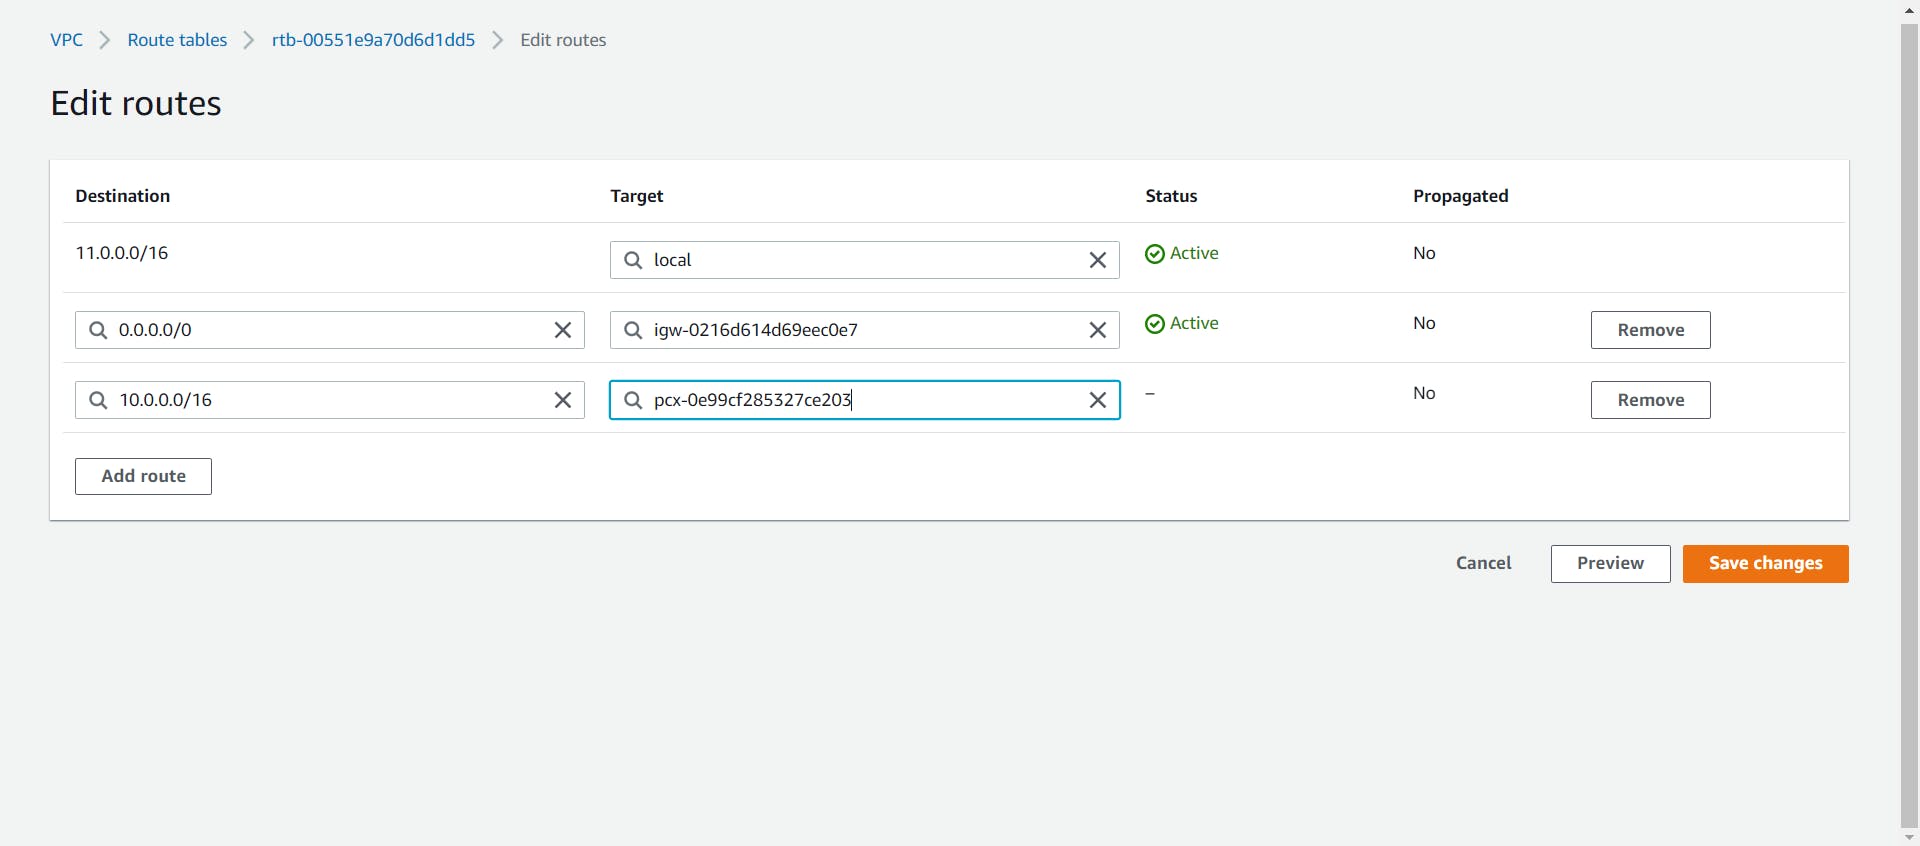
- Now, select the Route table which was created for the Second VPC, and edit it to add the First VPC's CIDR range.
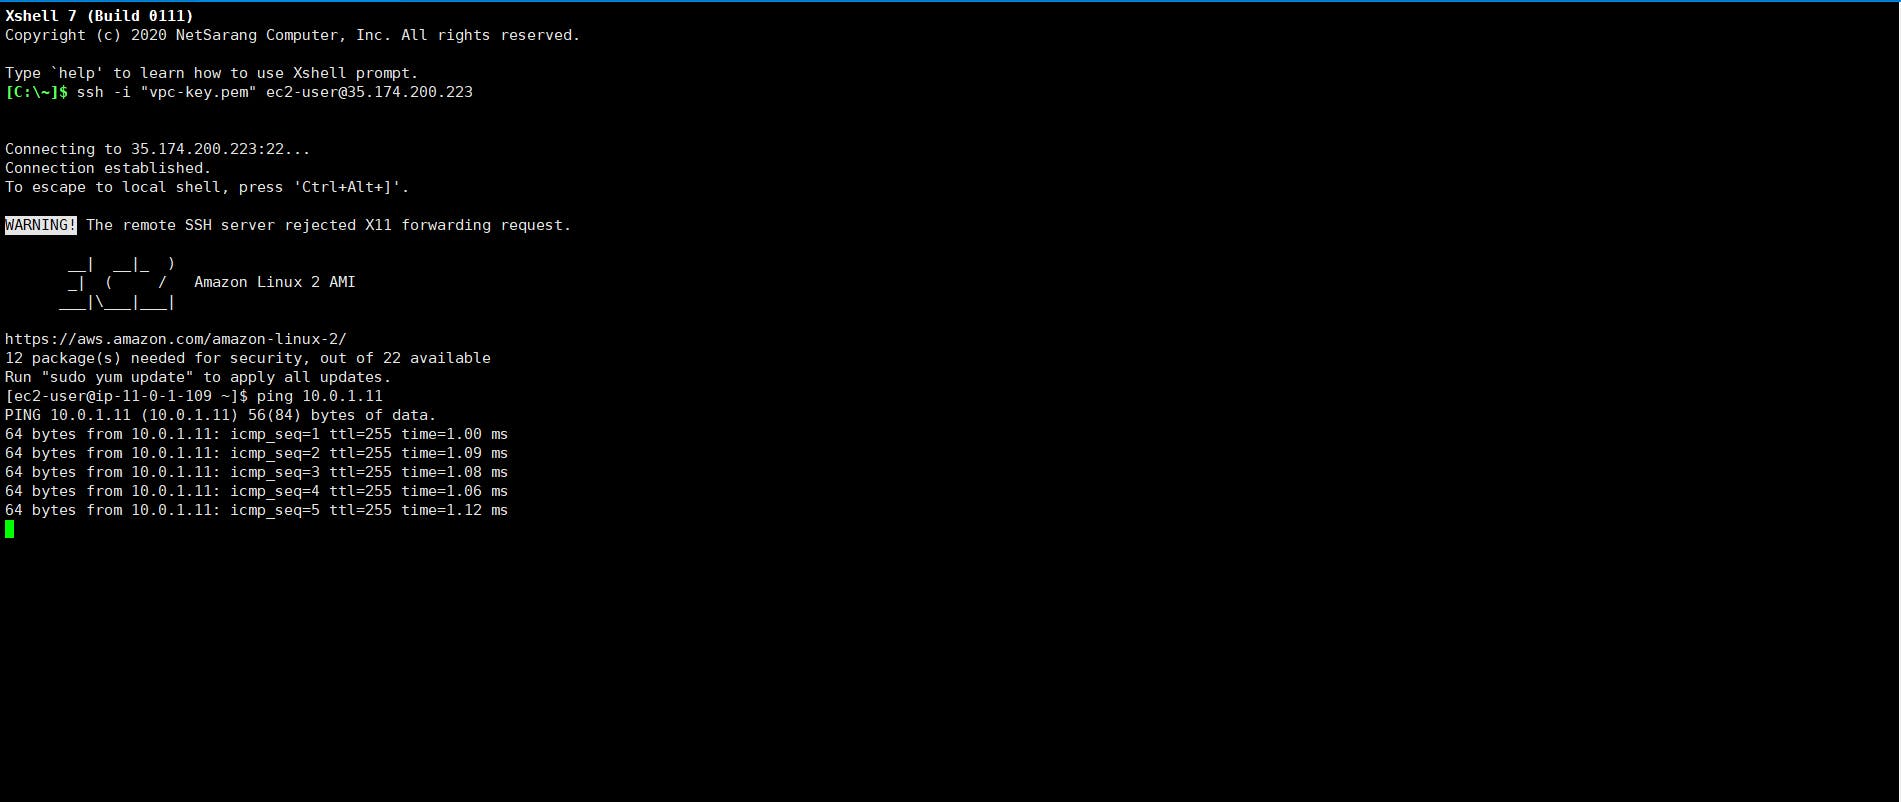
To check whether the Peering is correctly performed.
Go to the shell and connect the Instance linked to the Second VPC. Try connecting to the First VPC through the second VPC by typing ping "First VPC's CIDR"